
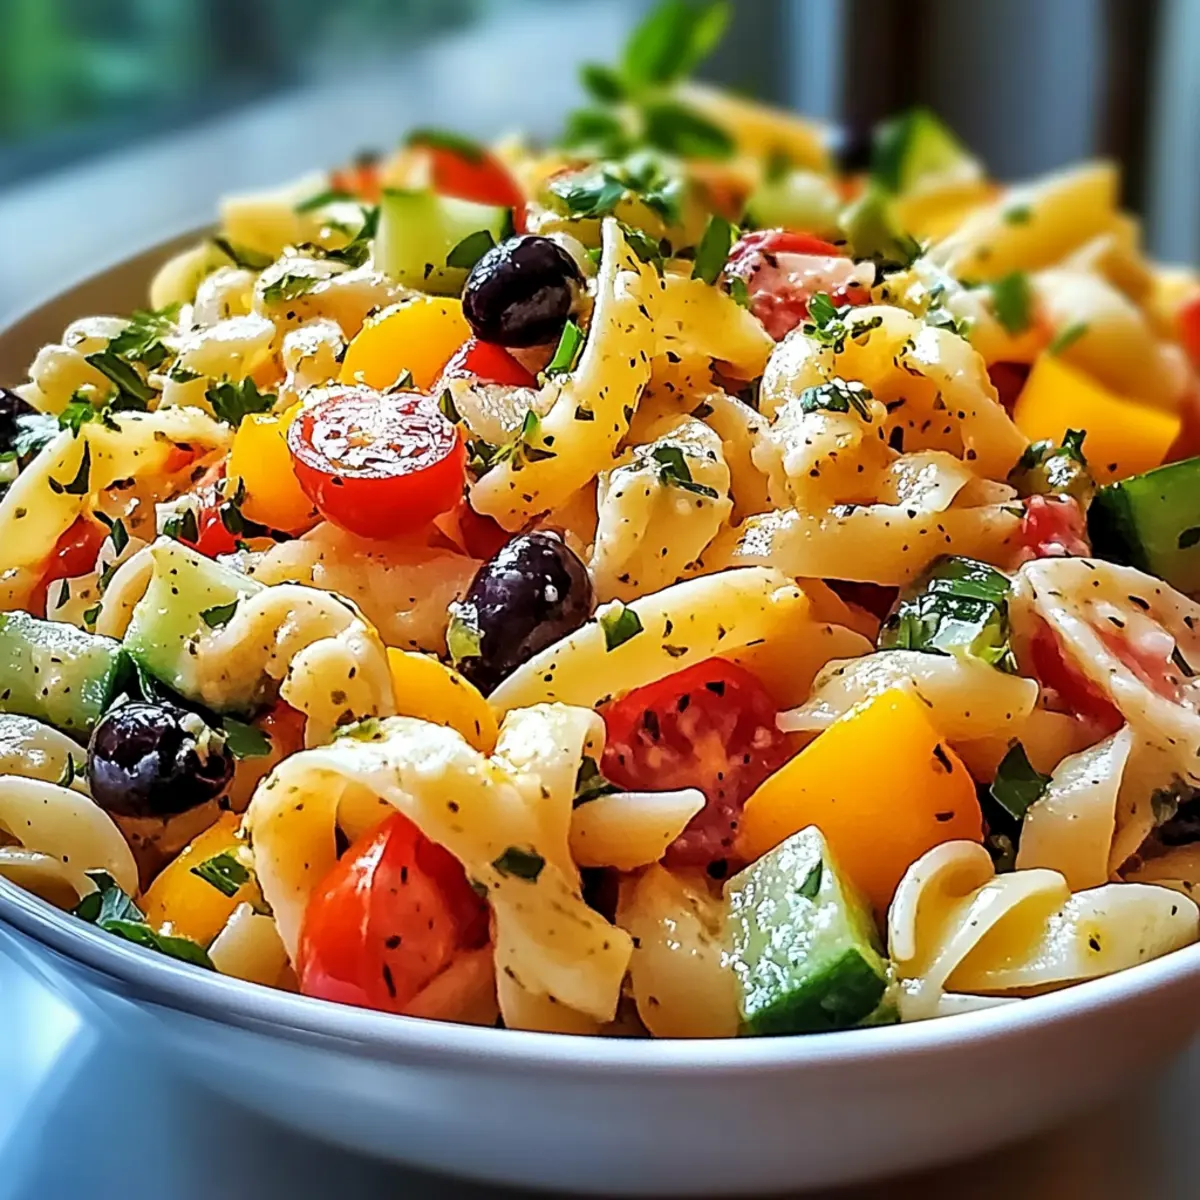
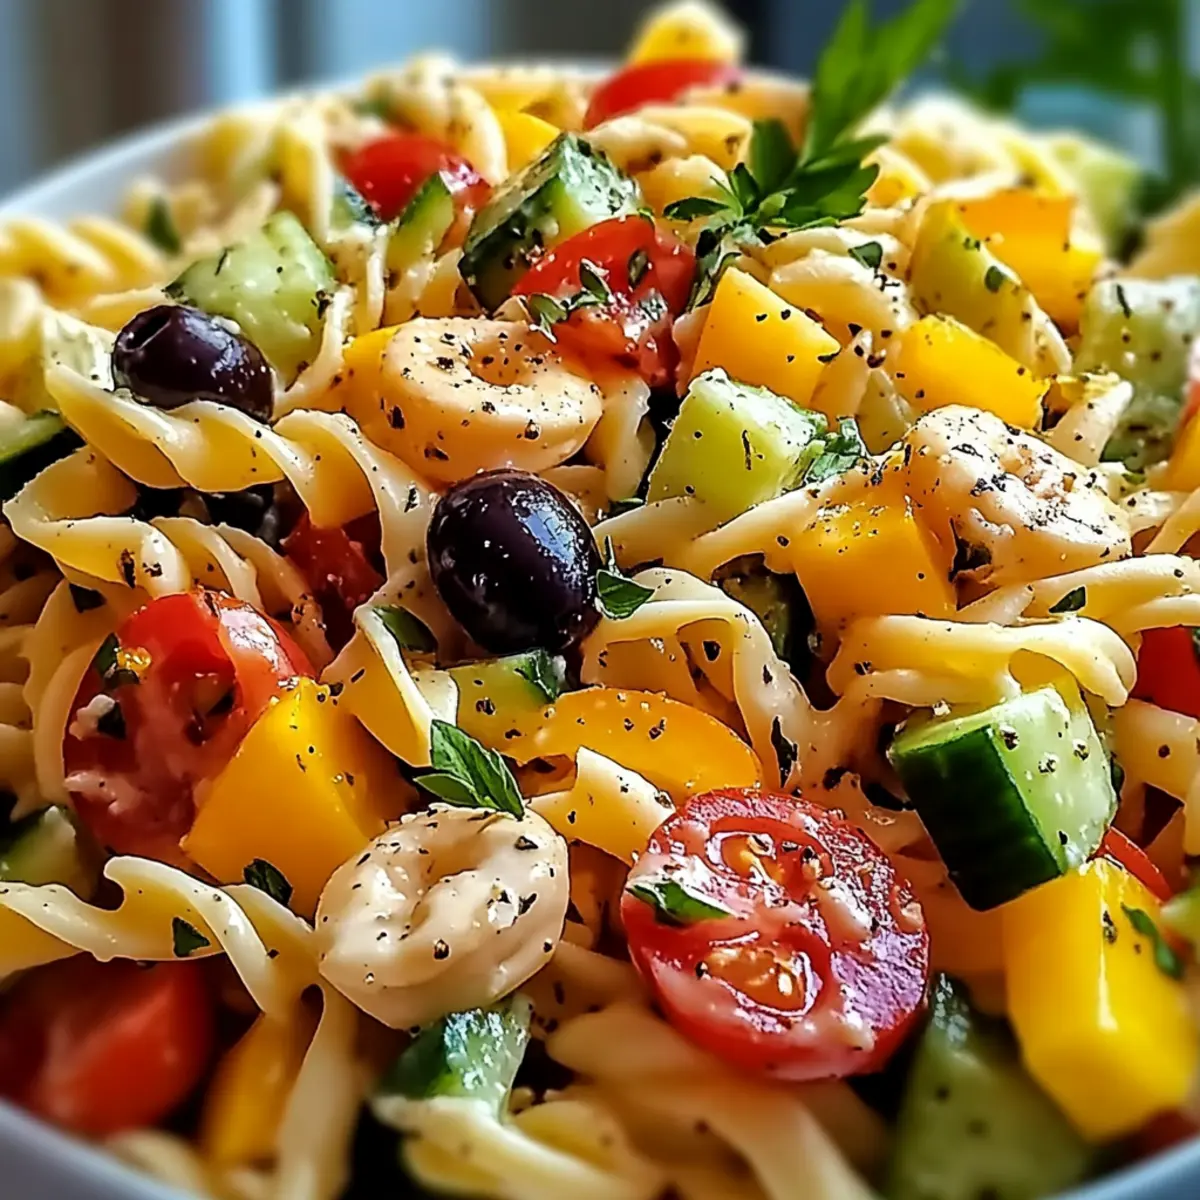
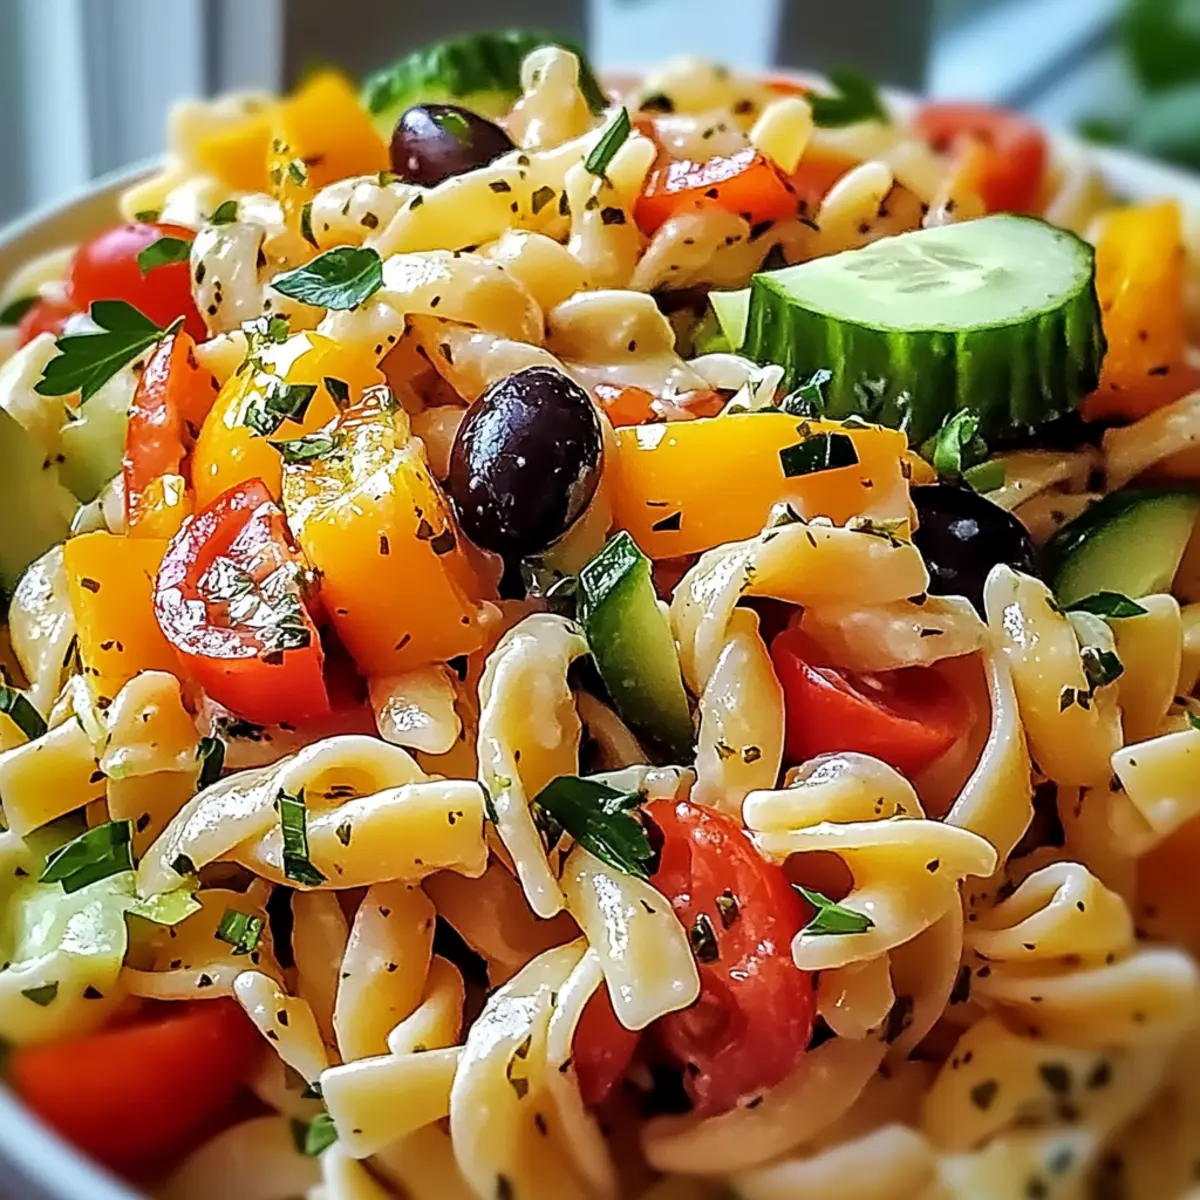
Amidst the sun-soaked nostalgia of backyard barbecues and summer picnics, fresh flavors unite in my favorite California Pasta Salad. This dish combines tender rotini with bright, crisp vegetables and creamy sharp cheddar, making it a go-to crowd-pleaser for any gathering. Not only is this recipe adaptable to your taste—whether you’re craving gluten-free options or a dairy-free twist—but its quick prep time means more moments spent enjoying the company of loved ones and less time in the kitchen. Perfect for potlucks, a light lunch, or simply a refreshing side, this salad embodies the spirit of easy, wholesome cooking. So, what colorful variations will you create to make this salad your own?
Why is this California Pasta Salad special?
Versatile Ingredients: This salad shines with its ability to adapt to your pantry staples and personal preferences! Quick & Easy: You can whip it up in no time, making it perfect for spontaneous gatherings. Bright & Flavorful: The combination of fresh vegetables and creamy cheese provides a delightful burst of flavor in every bite. Crowd-Pleaser: Kids and adults alike will love this colorful dish—perfect for potlucks and BBQs. Healthier Options: With gluten-free and dairy-free substitutions available, everyone can enjoy it without compromise. For a heartier option, consider adding grilled chicken or even pairing it with a delicious Cream Cheese Pasta for a complete meal!
California Pasta Salad Ingredients
For the Salad
• Rotini Pasta – The base of the salad that provides satisfying carbohydrates; swap for bowtie or gluten-free pasta if desired.
• Cherry Tomatoes – Adds a sweet, juicy burst to the mix; feel free to use any seasonal tomato variety.
• Cucumber – Contributes a refreshing crunch; try using English or Persian cucumbers for a crisp bite.
• Red Onion – Imparts sharpness and vibrant color; soak in cold water to mellow the flavor if raw onion is too strong.
• Black Olives – Offers a savory touch; can be replaced with green olives or omitted for a lower-sodium salad.
• Bell Pepper – Brings a crunchy texture and a splash of color; substitute with shredded carrots or snap peas for variety.
• Sharp Cheddar Cheese – Adds creamy richness and a hint of tang; swap for feta for a saltier option or a dairy-free cheese for a vegan experience.
• Italian Salad Dressing – Enlivens the flavors and adds a zesty kick; consider making your own vinaigrette for extra freshness.
• Fresh Parsley – Provides a vibrant garnish that enhances presentation; basil can be used as a delicious alternative.
• Salt and Pepper – Essential for seasoning and balancing flavors; adjust to suit your taste preferences.
Optional Protein Additions
• Grilled Chicken – Adds a hearty protein punch; perfect for making this salad a complete meal.
• Tuna – An easy, protein-rich option that pairs wonderfully with the flavors of the salad.
• Chickpeas – A great plant-based protein that complements the mix while keeping it light and fresh.
Step‑by‑Step Instructions for California Pasta Salad
Step 1: Cook the Pasta
Begin by bringing a large pot of salted water to a rolling boil over high heat. Add the rotini pasta and cook according to the package instructions, usually about 8-10 minutes, until it reaches an al dente texture. Once done, drain the pasta and rinse it under cold water to cool it down, preventing further cooking.
Step 2: Prepare the Vegetables
While the pasta cools, take a large mixing bowl and gather your vibrant vegetable ingredients. Chop the cherry tomatoes in halves, dice the cucumber, and slice the red onion into thin rings. Add the black olives, diced bell pepper, and any other preferred veggies into the bowl to create a colorful medley that will elevate your California Pasta Salad.
Step 3: Combine Ingredients
Once the pasta has cooled, introduce it to the bowl of vegetables. Sprinkle in the sharp cheddar cheese and gently mix everything together, ensuring the flavors interweave. The warmth of the pasta will slightly soften the cheese, making it even more deliciously creamy, while the colorful array of vegetables brings brightness to your California Pasta Salad.
Step 4: Dress the Salad
Next, drizzle your Italian salad dressing generously over the entire mixture. Using a large spoon, toss everything well to achieve an even coating of the salad dressing on each component, allowing all the fresh flavors to harmonize beautifully. The vibrant colors and enticing aroma will immediately draw everyone in!
Step 5: Season to Perfection
After tossing the salad, taste your California Pasta Salad and season it with salt and pepper to your liking. This simple step enhances the overall flavor and brings the dish together. Feel free to adjust the seasoning according to your preferences, ensuring each bite is satisfying and delicious.
Step 6: Chill and Serve
To let the flavors meld together, cover the bowl with plastic wrap or a lid and chill in the refrigerator for at least 30 minutes. This chilling time allows your California Pasta Salad to achieve optimal flavor and refreshingly coolness, making it irresistibly inviting when served at your next gathering. Prior to serving, garnish it with fresh parsley for a touch of brightness.

How to Store and Freeze California Pasta Salad
Fridge: Store your California Pasta Salad in an airtight container in the refrigerator for up to 3-4 days. Stir before serving to revive flavors and freshness.
Freezer: While not recommended due to potential texture changes, you can freeze California Pasta Salad for up to 2 months. To do this, omit the cheese before freezing, and add it back after thawing.
Room Temperature: If serving at a picnic or an outdoor event, do not leave the pasta salad out for more than 2 hours to maintain food safety.
Reheating: For best results, enjoy your salad cold, but if desired, gently reheat any leftover pasta that’s been frozen. Keep in mind that the texture may slightly change after freezing.
What to Serve with California Pasta Salad
Elevate your California Pasta Salad experience with delightful pairings that complement its fresh flavors and vibrant textures.
-
Grilled Chicken: Juicy grilled chicken adds a hearty protein element, making this dish a filling, well-rounded meal. It harmonizes beautifully with the salad’s zesty dressing and fresh veggies.
-
Garlic Bread: Crispy, buttery garlic bread provides a satisfying crunch, making each bite of your salad even more enjoyable. The aromatic flavors of garlic enhance the overall dining experience.
-
Fruit Salad: A refreshing fruit salad brings a sweet contrast to the savory notes of the California Pasta Salad. Seasonal fruits like watermelon and berries add a burst of juicy sweetness.
-
Roasted Vegetables: Earthy roasted vegetables like zucchini and bell peppers deepen the flavor profile of your meal. Their warmth and roasted sweetness pair perfectly with the pasta salad’s bright freshness.
-
Iced Tea: A chilled glass of iced tea brings a refreshing element to your meal. Its subtle sweetness and invigorating flavors balance the richness of the pasta salad, making for a delightful sip with every bite.
-
Sorbet: A light, fruit-flavored sorbet offers a refreshing, cool dessert that cleanses the palate after a savory meal. Its fruity notes echo the salad’s ingredients, creating a cohesive dining experience.
-
Potato Wedges: Crispy potato wedges add a hearty, comforting element to the meal. Their crispy exterior and fluffy interior contrast beautifully with the lightness of the pasta salad.
-
Antipasto Platter: An antipasto platter filled with marinated olives, cheese, and cured meats brings a savory, gourmet touch. This complements the pasta salad’s fresh taste while providing additional textures and flavors.
Make Ahead Options
These California Pasta Salad components are perfect for meal prep enthusiasts looking to save time during busy weeks! You can prepare the pasta and chop the vegetables up to 24 hours in advance; store them separately in airtight containers in the refrigerator to maintain freshness and crunch. When ready to serve, simply mix the prepped pasta and veggies, toss in the sharp cheddar and Italian dressing, and season with salt and pepper to taste. This approach not only keeps the salad flavorful but also helps prevent any sogginess, ensuring your California Pasta Salad is just as delicious as when freshly made. Enjoy effortless and delightful meals all week long!
Expert Tips for California Pasta Salad
-
Chill Time Matters: Allowing your California Pasta Salad to chill for at least 30 minutes helps the flavors meld perfectly, elevating the overall taste.
-
Seasonal Veggies: Opt for seasonal vegetables whenever possible; they not only enhance flavor but also boost nutritional value, making your pasta salad even more delightful.
-
Dress with Care: Drizzle your Italian dressing gradually; start with less and add more as needed. This helps avoid soggy pasta and ensures every bite is balanced.
-
Protein Boost: For added sustenance, consider incorporating grilled chicken, chickpeas, or even shrimp to transform your salad into a satisfying meal.
-
Control Onion Strength: If raw red onion is too pungent for your taste, soak it in cold water for a few minutes before adding to your salad to mellow the flavor.
-
Mix Up the Cheese: Don’t hesitate to experiment with different cheeses! Feta or mozzarella can add a unique twist to your California Pasta Salad without sacrificing creaminess.
California Pasta Salad Variations
Feel free to let your creativity flow and customize this salad to reflect your taste preferences and dietary needs!
-
Protein Boost: Add grilled chicken, shrimp, or chickpeas to turn your salad into a hearty meal. This twist offers a fulfilling taste while keeping the vibrant flavors intact.
-
Dairy-Free Cheese: Swap out sharp cheddar for a dairy-free cheese alternative to make this salad vegan-friendly. The creamy texture still complements the veggies beautifully, keeping it fresh and satisfying.
-
Pasta Shape Swap: Substitute rotini with bowtie, penne, or even whole grain pasta for a unique look and taste. Different shapes can enhance the eating experience, making it fun for both kids and adults.
-
Extra Veggies: Toss in roasted zucchini, avocados, or even diced artichokes for a flavor-packed addition. Each vegetable adds its own character, enriching the overall color and nutrition of the salad.
-
Dress It Up: Instead of Italian dressing, try a zesty lemon-herb vinaigrette or a creamy ranch for a different flair. Homemade dressings can elevate the whole dish, adding that personal touch you’ll love.
-
Seasonal Switch: Use seasonal produce like corn in the summer or butternut squash in the fall to make your California Pasta Salad a dish for all seasons. This keeps the recipe exciting and embraces fresh flavors available year-round.
-
Spice It Up: Add a pinch of red pepper flakes or a drizzle of sriracha to bring some heat to the dish. This twist might just convert spice fans into lovers of this colorful salad.
-
Alternative Greens: Mix in baby spinach or arugula for an added peppery crunch. Greens enhance the nutritional value and diversify the texture, making each bite delightful!
Remember, if you’re in the mood for more pasta inspiration, consider pairing this salad with a hearty Cream Cheese Pasta or a flavorful Cheeseburger Alfredo Pasta!
California Pasta Salad Recipe FAQs
How do I choose ripe vegetables for my California Pasta Salad?
Absolutely! Look for vibrant, firm veggies. For tomatoes, choose those that feel slightly soft with no dark spots. Cucumbers should have a firm skin, and bell peppers should be shiny and crisp. It’s best to buy seasonal produce, as they’ll have the strongest flavors and nutrients!
How should I store leftover California Pasta Salad?
Very simple! Store any leftovers in an airtight container in the refrigerator for up to 3-4 days. It’s always a good idea to give it a good stir before serving again; this brings those flavors back to life!
Can I freeze California Pasta Salad?
You can, but I recommend doing so carefully! To freeze, omit the cheese before placing the salad in an airtight container or freezer bag, and make sure to remove as much air as possible. It can last up to 2 months in the freezer. When you’re ready to enjoy it again, thaw in the refrigerator overnight and add fresh cheese before serving.
What should I do if my pasta salad turns out too soggy?
If your California Pasta Salad is soggy, it may be due to too much dressing or overly ripe ingredients. To remedy this, you can drain some of the excess liquid. If you need to make it firmer, adding more fresh vegetables or cooked pasta can also help absorb extra moisture.
Are there any common allergies to consider when making this salad?
Absolutely! Be mindful of cheese, as it’s a common allergen. For those who are lactose intolerant, consider substituting with a dairy-free cheese option. Also, for anyone sensitive to gluten, ensure to use gluten-free pasta to make this delightful dish suitable for everyone!
How do I prevent the pasta from sticking together after cooking?
To avoid sticking, make sure to rinse the pasta under cold water after draining. This not only cools it down for your salad but also removes excess starch that can cause sticking. Tossing the pasta with a little olive oil before mixing in the other ingredients can help keep it separate as well!
California Pasta Salad: A Colorful Twist for Every Table
Ingredients
Equipment
Method
- Cook the pasta according to package instructions in salted water until al dente, about 8-10 minutes. Drain and rinse under cold water.
- In a large mixing bowl, combine chopped cherry tomatoes, diced cucumber, sliced red onion, black olives, and diced bell pepper.
- Add the cooled pasta to the vegetable mix along with shredded sharp cheddar cheese. Gently mix until combined.
- Drizzle Italian salad dressing over the salad and toss until evenly coated.
- Season with salt and pepper to taste and mix well.
- Cover and chill in the refrigerator for at least 30 minutes before serving. Garnish with fresh parsley just before serving.
Leave a Reply