
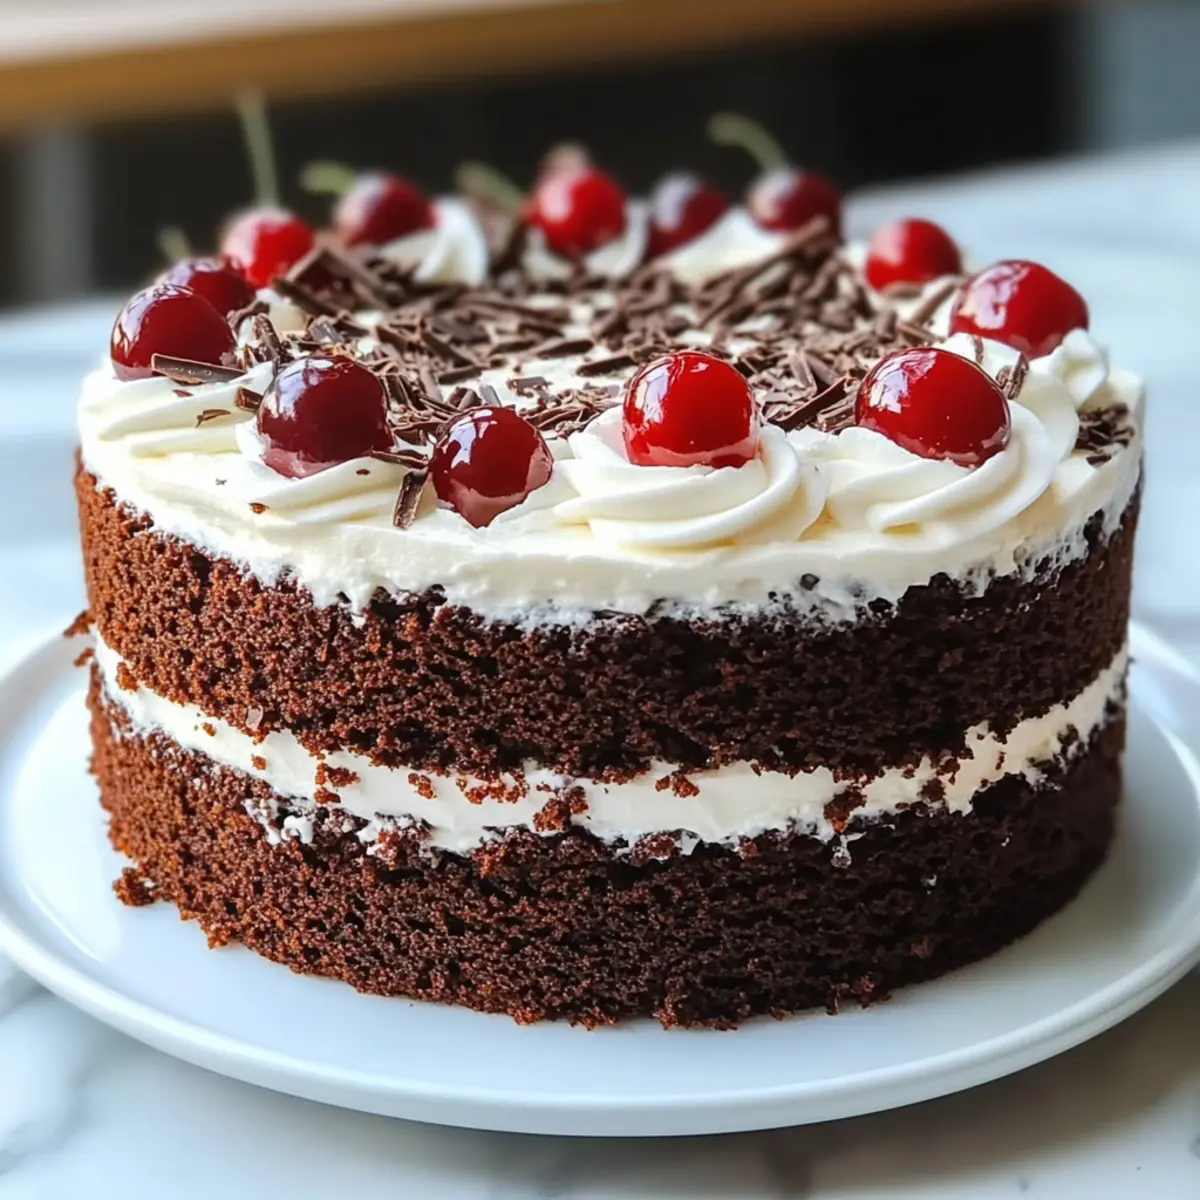
As I unwrapped the first slice of Black Forest Cake, the rich aroma of chocolate mingled with sweet cherries instantly transported me to a quaint café nestled in the heart of Germany. This Easy Black Forest Cake recipe doesn’t just capture that nostalgic essence; it brings together moist chocolate layers, luscious cherry filling, and a cloud of whipped cream that transforms any ordinary day into a celebration. Not only is it a crowd-pleaser for gatherings, but it’s also deceptively simple to make—perfect for when you want to impress your family or treat yourself to something special at home. Are you ready to dive into a slice of heaven? Let’s get baking!
Why is Black Forest Cake so special?
**Irresistible **: Each bite is a perfect balance of rich chocolate cake, sweet cherries, and airy whipped cream, making this dessert unforgettable.
Easy to make: Don’t let the impressive layers fool you; this recipe is straightforward, perfect for beginner bakers and experienced chefs alike.
Crowd-pleaser: Serve it at parties or family gatherings, and watch as your guests marvel at your baking skills while devouring every last slice!
Customizable delights: Feeling adventurous? Swap cherries for strawberries or raspberries, or add a hint of orange zest for a citrus twist!
Nostalgic flavor: Experience the taste of traditional German cuisine in the comfort of your home with this beloved dessert.
Elegant presentation: With beautiful layers and topped with chocolate shavings, this cake is as visually stunning as it is delicious. If you’re cringing about baking, try these easy recipes like Bread Pudding Cake or Strawberry Shortcake Muffins.
-
Ingredients
• Black Forest Cake Ingredients -
For the Cake
- All-Purpose Flour – Provides the structure for the cake layers.
- Cocoa Powder – Adds rich chocolate flavor, essential for its distinct taste.
- Granulated Sugar – Sweetens the cake and balances the cocoa’s bitterness.
- Large Eggs – Contributes moisture and structure to the cake.
- Vegetable Oil – Keeps the cake moist and tender.
- Buttermilk – Creates a tender crumb and enhances moisture.
- Baking Soda & Baking Powder – Leavening agents to make the cake rise.
- Salt – Enhances and balances flavors within the cake.
- For the Cherry Filling
- Cherry Filling (or Cherries in Syrup) – Provides the classic fruity sweetness associated with Black Forest Cake.
- Kirsch (Cherry Liqueur) – Adds moisture and enhances the cherry flavor.
- For the Whipped Cream Frosting
- Heavy Cream – Forms the light, fluffy whipped cream frosting.
- Powdered Sugar – Sweetens the whipped cream.
- For Garnishing
- Chocolate Shavings – Adds visual appeal and richness.
- Fresh Cherries – For garnishing and extra fruity flavor.
This delicious Black Forest Cake awaits, and every ingredient plays an essential role in creating this delightful dessert that will undoubtedly wow your guests!
Step‑by‑Step Instructions for Black Forest Cake
Step 1: Preheat the Oven and Prepare Pans
Begin by preheating your oven to 350°F (175°C). While the oven is warming, grease two 9-inch round cake pans and line the bottoms with parchment paper. This preparation ensures that your Black Forest Cake layers release easily after baking, helping you achieve perfectly shaped cakes.
Step 2: Combine Dry Ingredients
In a large mixing bowl, whisk together 2 cups of all-purpose flour, 1 ¾ cups granulated sugar, ¾ cup cocoa powder, 1 ½ teaspoons baking powder, 1 ½ teaspoons baking soda, and 1 teaspoon salt. Make sure there are no lumps in the mixture to guarantee a light and fluffy chocolate cake. This blend of dry ingredients forms the base of your delicious Black Forest Cake.
Step 3: Mix Wet Ingredients
Add 2 large eggs, 1 cup of buttermilk, ½ cup of vegetable oil, and 2 teaspoons of vanilla extract to the dry ingredients. Mix until all components are fully incorporated. Gradually add 1 cup of boiling water to the batter, stirring until smooth. The hot water helps deepen the chocolate flavor while creating a moist texture throughout your cake layers.
Step 4: Bake the Cakes
Evenly divide the batter between the prepared cake pans. Place them in the preheated oven and bake for 30-35 minutes, or until a toothpick inserted into the center comes out clean. Listen for a light sizzle as they bake, and once done, the cakes should look domed and slightly springy to the touch.
Step 5: Cool the Cakes
Once baked, remove the cakes from the oven and let them cool in the pans for about 10 minutes. Carefully turn the cake layers out onto a wire rack to cool completely. This step is crucial to prevent your Black Forest Cake from becoming soggy; make sure they are completely cool before assembling.
Step 6: Prepare the Cherry Filling
For the cherry filling, combine 2 cups of cherries (fresh or canned) with ½ cup of sugar in a saucepan over medium heat. Cook until the cherries release their juices, about 5-7 minutes. Thicken the mixture with a cornstarch slurry, stirring consistently until glossy, then allow it to cool completely before using it in your cake.
Step 7: Whip the Cream
In a chilled mixing bowl, pour in 2 cups of heavy cream and add ½ cup of powdered sugar and 1 teaspoon of vanilla extract. Whip the cream using an electric mixer on medium speed until stiff peaks form. This airiness is key to the delightful whipped cream topping of your Black Forest Cake, so keep an eye on it to avoid overwhipping.
Step 8: Assemble the Cake
Start by layering one of the cooled chocolate cakes on a serving plate. Spread a generous layer of whipped cream on top, followed by half of the cherry filling. Place the second cake layer on top, and frost the entire cake with the remaining whipped cream. This assembly highlights the delicious layers that make up your Black Forest Cake.
Step 9: Garnish and Chill
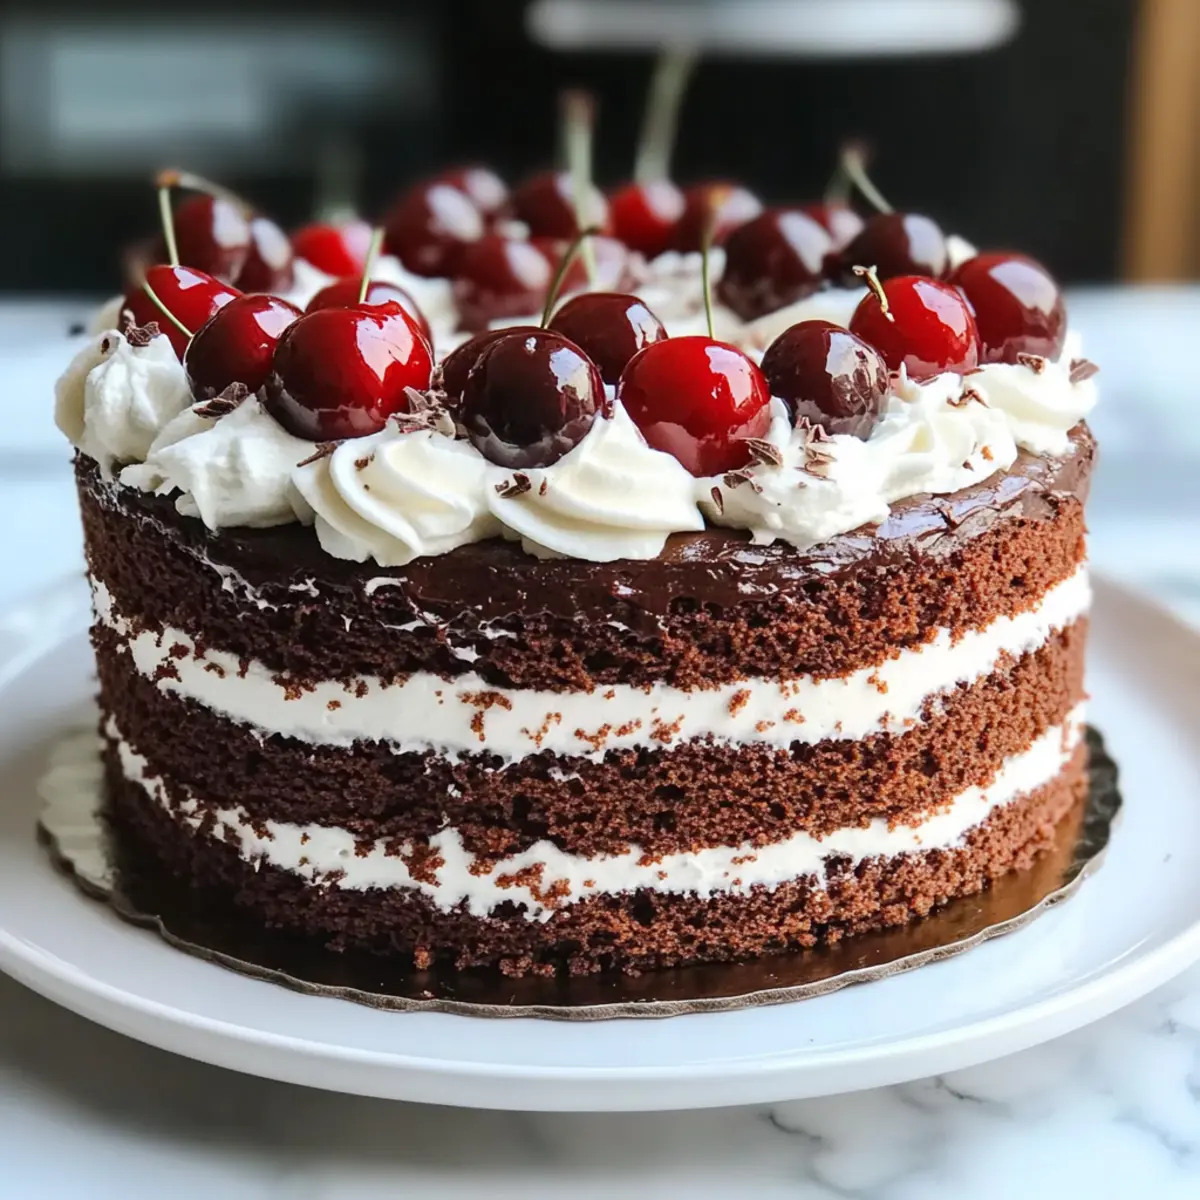
Decorate the top with chocolate shavings and fresh cherries for an elegant touch. After garnishing, refrigerate the assembled Black Forest Cake for 2-3 hours to allow the flavors to meld beautifully. This chilling period not only enhances the taste but also makes slicing easier and more visually appealing.
What to Serve with Easy Black Forest Cake
Delight your senses by creating the perfect meal to complement this rich and indulgent dessert, enhancing every moment of your enjoyment.
-
Fresh Berries: A medley of strawberries and blueberries balances the sweetness of the cake with refreshing tartness, adding a pop of color to your plate.
-
Vanilla Ice Cream: The creamy, silky texture of vanilla ice cream pairs beautifully with the layers of chocolate and cherry, providing a delightful contrast.
-
Espresso or Coffee: A bold cup of espresso or brewed coffee helps to cut through the sweetness, enhancing the chocolate flavors in the cake.
-
Chocolate Sauce: Drizzling warm chocolate sauce over a slice is a rich addition, creating a decadent experience that chocolate lovers will adore.
-
Coconut Cream: Light and fluffy coconut cream can add an exotic twist, with its subtle flavor and airy texture enhancing the cake’s richness effortlessly.
-
Whipped Cream: Serving an extra side of whipped cream gives guests the option to add more creaminess, making each bite even more luscious.
-
Mint Leaves: A sprinkle of fresh mint on the side not only adds a refreshing touch but also a vibrant green contrast, making the presentation pop.
-
Sparkling Water: A glass of chilled sparkling water with a slice of lemon provides a refreshing palette cleanser between bites, ensuring you savor each layer.
Each of these pairings perfectly complements the beautiful layers of the Easy Black Forest Cake, making your dessert experience truly memorable.
Tips for the Best Black Forest Cake
Flavorful Cocoa: Use high-quality unsweetened cocoa powder for a richer chocolate flavor. Cheaper brands may lack depth.
Egg Temperature: Ensure your eggs are at room temperature before mixing. This helps create a smoother batter and better rise.
Don’t Overmix: Once you combine wet and dry ingredients, mix until just combined. Overmixing can lead to a dense cake texture in your Black Forest Cake.
Chill Your Cream: For perfectly whipped cream, chill your mixing bowl and beaters beforehand. This ensures your cream reaches stiff peaks effortlessly.
Proper Cooling: Allow the cake layers to cool completely before assembly. This prevents the whipped cream from melting and creates a beautifully layered dessert.
Chill Before Serving: Refrigerating the assembled cake for a few hours before serving enhances flavor melding and makes slicing easier.
How to Store and Freeze Black Forest Cake
Fridge: Store leftover Black Forest Cake in an airtight container for up to 3 days. This keeps the layers moist and the flavors intact, perfect for enjoying later.
Freezer: For longer storage, wrap individual slices or the whole cake tightly in plastic wrap, then foil. Freeze for up to 2 months. Thaw in the fridge before serving to retain moisture.
Reheating: If desired, gently reheat individual slices in the microwave for about 10-15 seconds, allowing the creamy texture to return without compromising flavor.
Black Forest Cake Variations & Substitutions
Feel free to get creative and make this classic cake your own with these delightful twists!
-
Gluten-Free: Substitute all-purpose flour with a gluten-free blend to enjoy a gluten-free version without sacrificing flavor.
-
Dairy-Free: Use almond milk mixed with a little vinegar in place of buttermilk, and swap heavy cream for coconut cream for a vegan-friendly delight.
-
Different Fruits: Instead of cherries, try raspberries or strawberries for a fresh, fruity twist that keeps things exciting.
-
Layered Luxury: Double the recipe to create a stunning four-layer cake, adding even more deliciousness in every bite.
-
Zesty Whipped Cream: Add a hint of orange or lemon zest to the whipped cream for a refreshing citrus note that brightens up the dessert.
-
Nutty Crunch: Incorporate chopped nuts, like almonds or walnuts, either in the cake batter or as a garnish to add a delightful crunch.
-
Chocolate Chips: Sprinkle mini chocolate chips into the cake batter for extra chocolatey goodness and textural contrast.
If you’re loving the idea of experimenting with flavors, why not also try these fabulous recipes like Brown Butter Cake or Strawberry Cheesecake Truffle? Your culinary creativity is your only limit!
Make Ahead Options
These Easy Black Forest Cake preparations are fantastic for busy home cooks looking to save time without sacrificing flavor! You can bake the chocolate cake layers up to 24 hours in advance; simply cool them completely, then wrap tightly in plastic wrap and refrigerate to maintain moisture. The cherry filling can also be prepared ahead and stored in the fridge for up to 3 days, ensuring the cherry flavors are vibrant. When ready to assemble, just whip your cream fresh—this guarantees that airy texture—then layer your cake with whipped cream and cherry filling. This way, you can enjoy a delightful dessert with minimal effort when it’s time to serve!
Black Forest Cake Recipe FAQs
What kind of cherries should I use for Black Forest Cake?
Absolutely! For an authentic taste, dark sweet cherries are ideal, whether fresh, canned, or even frozen. If using canned cherries, look for those packed in juice rather than syrup for a more natural flavor. If you’re opting for fresh, ensure they are ripe and plump, as this will enhance the cake’s taste.
How should I store leftovers of my Black Forest Cake?
Very! To keep your Black Forest Cake fresh, cover it with plastic wrap or store it in an airtight container in the fridge. It will stay delicious for up to 3 days. Just remember, the longer it sits, the more moisture it absorbs, so it’s best enjoyed within this timeframe!
Can I freeze my Black Forest Cake?
Of course! If you want to freeze your Black Forest Cake, first make sure it’s completely cool. Wrap individual slices or the whole cake tightly in plastic wrap, then in foil. It can be frozen for up to 2 months. When you’re ready to enjoy it, simply thaw it in the refrigerator overnight to retain its moisture and flavor.
What if my cake layers are domed or uneven after baking?
Not to worry! If your cake layers rise unevenly, you can use a serrated knife to level them off after they have cooled completely. Simply slice off the domed top to create a flat surface for stacking, ensuring a stable and beautiful presentation for your Black Forest Cake.
Are there any dietary considerations for Black Forest Cake?
Definitely! If you’re baking for someone with dietary restrictions, consider using gluten-free flour in place of all-purpose flour, and opt for coconut sugar instead of granulated sugar for a healthier option. To make it alcohol-free, simply omit the kirsch and substitute it with cherry juice. This way, everyone can enjoy a slice of this delightful dessert!
Irresistible Black Forest Cake That Will Wow Your Guests
Ingredients
Equipment
Method
- Preheat the oven to 350°F (175°C) and prepare two 9-inch cake pans.
- In a mixing bowl, whisk together the dry ingredients: flour, sugar, cocoa powder, baking powder, baking soda, and salt.
- Add eggs, buttermilk, vegetable oil, and vanilla extract to the dry ingredients and mix well. Gradually add boiling water.
- Divide the batter between the prepared pans and bake for 30-35 minutes.
- Cool the cakes in the pans for 10 minutes, then transfer to a wire rack to cool completely.
- In a saucepan, combine cherries and sugar, cooking until juices release. Thicken and cool the filling.
- Whip the cream with powdered sugar and vanilla until stiff peaks form.
- Layer one cake on a serving plate, spread whipped cream and half of the cherry filling, add the second layer, and frost with remaining cream.
- Decorate with chocolate shavings and cherries, then refrigerate for 2-3 hours.
Leave a Reply