
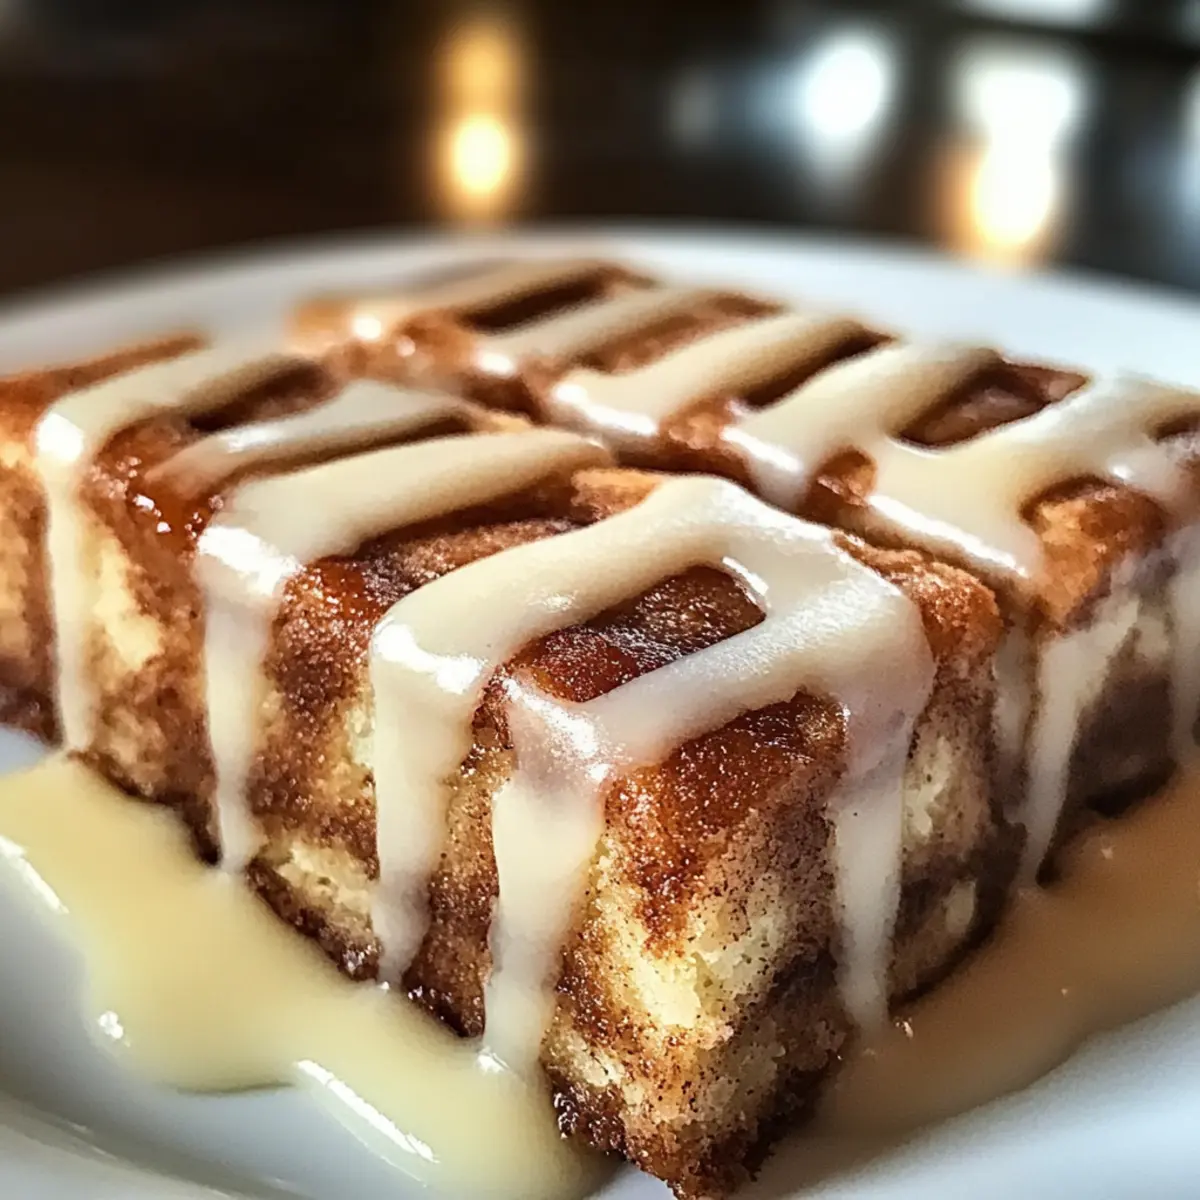
As I was sipping on my morning coffee, the scent of cinnamon wafted through the kitchen, instantly lifting my spirits. That cozy, warm embrace of nostalgia is exactly what inspired my latest creation: Cinnamon Roll Bliss Bars. This delightful dessert captures all the beloved flavors of traditional cinnamon rolls but in an easy-to-bake bar form—a true game-changer for busy days! With just 45 minutes of prep time, these bars are not only a crowd-pleaser, but they’re also a breeze to whip up, perfect for unexpected guests or a sweet treat after dinner. So, why stick to fast food when you can embrace homemade happiness? Curious to see how this comforting dessert comes together? Let’s dive into the recipe!
Why Are Cinnamon Roll Bliss Bars Irresistible?
Warm, Chewy Texture: The soft and chewy consistency of these bars resembles freshly baked cookies, offering the perfect comforting bite.
Quick & Easy: With just 45 minutes of prep time, it’s quicker than waiting for takeout!
Party Favorite: These bars are sure to impress at any gathering, pairing beautifully with your favorite coffee or tea.
Customizable Delight: Feel free to add nuts, chocolate chips, or even try different frostings like cream cheese for a special touch! Pair them with Cinnamon Roll Overnight Oats for a delightful breakfast twist!
Perfect for Sharing: The bar format makes it easy to serve and share, bringing joy to friends and family with every bite.
With these reasons, why not elevate your dessert game and swap out fast food for some homemade bliss?
Cinnamon Roll Bliss Bars Ingredients
For the Batter
- All-Purpose Flour – Acts as the structuring agent; substitute with gluten-free flour blend for gluten-free bars.
- Baking Powder – This leavening agent helps your bars rise; ensure it’s fresh for the best results.
- Baking Soda – Provides additional leavening to enhance texture.
- Ground Cinnamon – Delivers a warm, comforting flavor; using freshly ground spices yields a better aroma.
- Salt – Balances the sweetness and enhances the overall flavor.
- Butter (softened) – Adds rich moisture to the batter; unsalted butter allows for better sodium control.
- Granulated Sugar – The primary sweetener that gives these bars their delightful sweetness.
- Brown Sugar – Infuses flavor depth and moisture; feel free to choose dark or light depending on your taste.
- Eggs – Binds the ingredients together and contributes to the texture; use eggs at room temperature for optimal mixing.
- Sour Cream – Helps keep the bars moist and adds a delightful tang; Greek yogurt is a fantastic lighter alternative.
- Vanilla Extract – Infuses a pleasant aroma and flavor; opt for pure extract over imitation for best taste.
For the Topping
- Granulated Sugar – Sweetens the cinnamon topping, enhancing the overall dessert experience.
- Ground Cinnamon – Sprinkled on top, it amplifies the cinnamon flavor we love!
Use these simple ingredients to create mouthwatering Cinnamon Roll Bliss Bars—a treat that’s sure to be cherished!
Step‑by‑Step Instructions for Cinnamon Roll Bliss Bars
Step 1: Preheat the Oven
Begin by preheating your oven to 350°F (175°C). While it warms up, prepare a 9×13 inch baking pan by greasing it with butter or non-stick spray. This ensures your Cinnamon Roll Bliss Bars will easily release after baking and helps achieve that perfectly golden edge that everyone loves.
Step 2: Cream the Butters and Sugars
In a large mixing bowl, combine softened butter, granulated sugar, and brown sugar. Using an electric mixer, cream these ingredients together until the mixture is smooth and fluffy, about 2-3 minutes. This step is crucial as it incorporates air into the butter, yielding light and tender bars.
Step 3: Mix in the Wet Ingredients
Next, add in the eggs, sour cream, and vanilla extract to the butter-sugar mixture. Mix well on medium speed until everything is fully incorporated and creamy, about 1-2 minutes. This blend will form the moist base of your Cinnamon Roll Bliss Bars, adding delightful richness and flavor.
Step 4: Combine the Dry Ingredients
In a separate bowl, whisk together the all-purpose flour, baking powder, baking soda, ground cinnamon, and salt. This step helps evenly distribute the leavening agents and spices throughout the flour. Once mixed, gradually add the dry ingredients into the wet mixture, stirring gently until just combined to avoid overmixing.
Step 5: Prepare the Batter
Spread the batter evenly into the greased baking pan, using a spatula to smooth out the surface. The batter should fill the pan completely, creating a thick, luscious layer that will become your dreamy Cinnamon Roll Bliss Bars. Ensure the edges are level for even baking.
Step 6: Create the Cinnamon Topping
In a small bowl, mix together granulated sugar and additional ground cinnamon to make the topping. Sprinkle this mixture generously over the batter in the baking pan. This flavorful blend will create a delightful swirl that mimics the classic taste of cinnamon rolls.
Step 7: Bake the Bars
Place the pan in the preheated oven and bake for 25-30 minutes. Keep an eye on them; the edges should be lightly golden, and a toothpick inserted in the center should come out clean. This stage is crucial for achieving that perfect texture of your Cinnamon Roll Bliss Bars.
Step 8: Cool and Frost
Once baked, remove the pan from the oven and allow the bars to cool completely in the pan. This cooling phase ensures the frosting adheres better. While they cool, prepare your frosting by mixing powdered sugar, milk, and vanilla extract until smooth and creamy, ready to top your bars.
Step 9: Frost the Bars
Once the Cinnamon Roll Bliss Bars are cool, drizzle your creamy frosting evenly across the top. This finishing touch adds sweetness and creaminess, elevating your dessert experience. Ensure every corner is covered for maximum indulgence.
Step 10: Slice and Serve
After frosting, slice the bars into squares or rectangles for easy serving. The joyful aroma will surely entice everyone around, making these bars perfect for sharing. Enjoy your homemade Cinnamon Roll Bliss Bars warm or at room temperature to appreciate their chewy, comforting texture!
Storage Tips for Cinnamon Roll Bliss Bars
Room Temperature: Store your bars in an airtight container at room temperature for up to 3 days to maintain their delightful softness and flavor.
Fridge: If you prefer, you can refrigerate the bars for up to a week. Just remember to cover them tightly to prevent drying out.
Freezer: For longer storage, freeze the Cinnamon Roll Bliss Bars in an airtight container for up to 2 months. Thaw at room temperature before serving to restore their chewy texture.
Reheating: If desired, warm individual bars in the microwave for about 10-15 seconds for that fresh-out-of-the-oven taste enjoyed all over again!
Cinnamon Roll Bliss Bars Variations
Feel free to explore these delightful twists to make your Cinnamon Roll Bliss Bars even more enjoyable!
-
Gluten-Free: Substitute all-purpose flour with a gluten-free flour blend for a gluten-free option, ensuring everyone can indulge.
-
Nutty Treat: Fold in chopped walnuts or pecans into the batter for added crunch and a delightful nutty flavor. The nutty texture pairs beautifully with the softness of the bars.
-
Chocolate Swirl: Add chocolate chips into the batter or create a chocolate drizzle on top instead of the frosting for a rich twist. Chocolate and cinnamon together are simply irresistible!
-
Fruit Infusion: Incorporate dried fruits like raisins or cranberries into the batter for a burst of flavor and chewiness. This unexpected addition turns your bars into a delightful fruity treat.
-
Frosting Alternatives: Swap out the vanilla frosting for cream cheese frosting or a chocolate ganache for a different flavor profile. A tangy cream cheese frosting will balance out the sweetness perfectly.
-
Spicy Kick: Add a pinch of cayenne pepper to the cinnamon topping for a surprising kick that will awaken your taste buds. Just a little heat will elevate the experience!
Explore these variations to suit your taste or the occasion! And if you’re looking for a tasty breakfast option, try pairing them with Cinnamon Roll Overnight Oats for a delightful start to your day!
What to Serve with Cinnamon Roll Bliss Bars
Elevate your dessert experience by pairing these delightful treats with a variety of complementary sides and drinks.
-
Creamy Vanilla Ice Cream: The coolness of vanilla ice cream contrasts beautifully with the warm cinnamon flavors. A scoop on the side makes every bite indulgent!
-
Freshly Brewed Coffee: Sipping on a rich coffee enhances the cinnamon taste, creating a cozy coffee-shop vibe right in your home.
-
Fruit Salad: A refreshing mix of seasonal fruits adds brightness and acidity, balancing the cinnamon sweetness perfectly. Consider adding a squeeze of lime for zest!
-
Warm Milk: An old-fashioned pairing that evokes nostalgia! The creaminess of warm milk softens the cinnamon flavors, making it an ideal comfort drink.
-
Chocolate Sauce: Drizzling chocolate sauce over the bars adds a decadent twist. The richness of chocolate combined with cinnamon is pure bliss!
-
Spiced Apple Cider: On a chilly day, serving spiced apple cider alongside your Cinnamon Roll Bliss Bars brings warmth and a delightful seasonal touch.
-
Coconut Whipped Cream: Light and airy, this tropical twist provides a creamy contrast that will elevate your bars to a whole new level. Perfect for a summer gathering!
-
Lemonade Spritzer: For a refreshing drink option, pair these with a light lemonade spritzer. The acidity complements the sweetness, making it a fun twist.
With these ideas, your Cinnamon Roll Bliss Bars will shine even brighter as a centerpiece for delicious homemade moments!
Expert Tips for Cinnamon Roll Bliss Bars
-
Creaming Butter Right: Ensure you cream the butter with sugars thoroughly, as this aerates the mixture, leading to light and fluffy bars.
-
Avoid Overmixing: Stop mixing as soon as there are no dry ingredients visible to prevent dense bars; this helps keep your Cinnamon Roll Bliss Bars tender.
-
Cool Before Frosting: Let the bars cool completely in the pan before applying frosting for an even layer that sticks and enhances texture.
-
Use Fresh Ingredients: Fresh baking powder and ground cinnamon can significantly enhance flavor and texture, making your bars taste deliciously homemade.
-
Customize Your Topping: Feel free to experiment with toppings! Consider adding nuts or chocolate chips for extra flavor and texture in your bars.
Make Ahead Options
These Cinnamon Roll Bliss Bars are perfect for those busy days when time is of the essence! You can prepare the batter up to 24 hours in advance; just combine all the wet and dry ingredients, but leave off the cinnamon topping. Store the prepared batter in an airtight container in the refrigerator. When you’re ready to bake, simply spread the batter in the greased pan, sprinkle the topping, and pop it in the oven. For optimal freshness, I recommend frosted bars be eaten within 3 days or they can be frozen for up to 2 months. Just thaw them overnight in the fridge before serving, and you’ll enjoy the same delightful taste straight from your oven!
Cinnamon Roll Bliss Bars Recipe FAQs
How do I choose the right cinnamon for my bars?
Absolutely! I recommend using freshly ground cinnamon for an enhanced aroma and flavor in your Cinnamon Roll Bliss Bars. It has a more potent taste compared to pre-ground cinnamon. If you have access to a spice grinder, go for whole cinnamon sticks; they will give your bars that authentic, warm essence that will light up your kitchen!
How should I store my Cinnamon Roll Bliss Bars?
Very easy! To keep your bars fresh and soft, simply place them in an airtight container and store them at room temperature for up to 3 days. For longer storage, you can refrigerate them for up to a week, but be sure to cover them tightly to avoid drying out.
Can I freeze Cinnamon Roll Bliss Bars?
Yes, you totally can! To freeze your Cinnamon Roll Bliss Bars, first, allow them to cool completely. Cut them into squares and layer them in an airtight container with parchment paper in between to prevent sticking. They can be frozen for up to 2 months. When you’re ready to enjoy, simply thaw them at room temperature or pop them in the microwave for about 10-15 seconds for that fresh-from-the-oven taste.
What should I do if my bars come out too dense?
If your Cinnamon Roll Bliss Bars turn out denser than expected, it’s usually due to overmixing the batter. Make sure to gently mix until no dry flour is visible, and be mindful of the mixing speed. Using fresh ingredients, particularly the baking powder, can also make a big difference in achieving the right texture.
Can these bars be made gluten-free?
Absolutely! You can substitute the all-purpose flour with a gluten-free blend designed for baking. Ensure it includes xanthan gum for structure, which mimics the properties of wheat flour. It’ll give you equally delicious Cinnamon Roll Bliss Bars without the gluten!
Are Cinnamon Roll Bliss Bars suitable for pets?
While the bars are delightful for humans, it’s best to keep them away from pets. Ingredients like sugar and dairy may not be suitable for your furry friends, so make sure they stick to their own treats!
Cinnamon Roll Bliss Bars: Warm, Chewy Dessert Magic
Ingredients
Equipment
Method
- Preheat your oven to 350°F (175°C) and grease a 9x13 inch baking pan with butter or non-stick spray.
- In a large mixing bowl, cream softened butter, granulated sugar, and brown sugar until smooth and fluffy, about 2-3 minutes.
- Add in the eggs, sour cream, and vanilla extract to the mixture and mix on medium speed until creamy, about 1-2 minutes.
- In a separate bowl, whisk together flour, baking powder, baking soda, cinnamon, and salt. Gradually add to the wet mixture, stirring gently.
- Spread the batter evenly into the greased baking pan, ensuring the edges are level.
- Mix together granulated sugar and ground cinnamon for the topping and sprinkle generously over the batter.
- Bake for 25-30 minutes until lightly golden edges appear, and a toothpick inserted in the center comes out clean.
- Allow the bars to cool completely in the pan before frosting.
- Prepare frosting by mixing powdered sugar, milk, and vanilla extract until smooth; drizzle over cooled bars.
- Slice the bars into squares or rectangles for serving.
Leave a Reply