
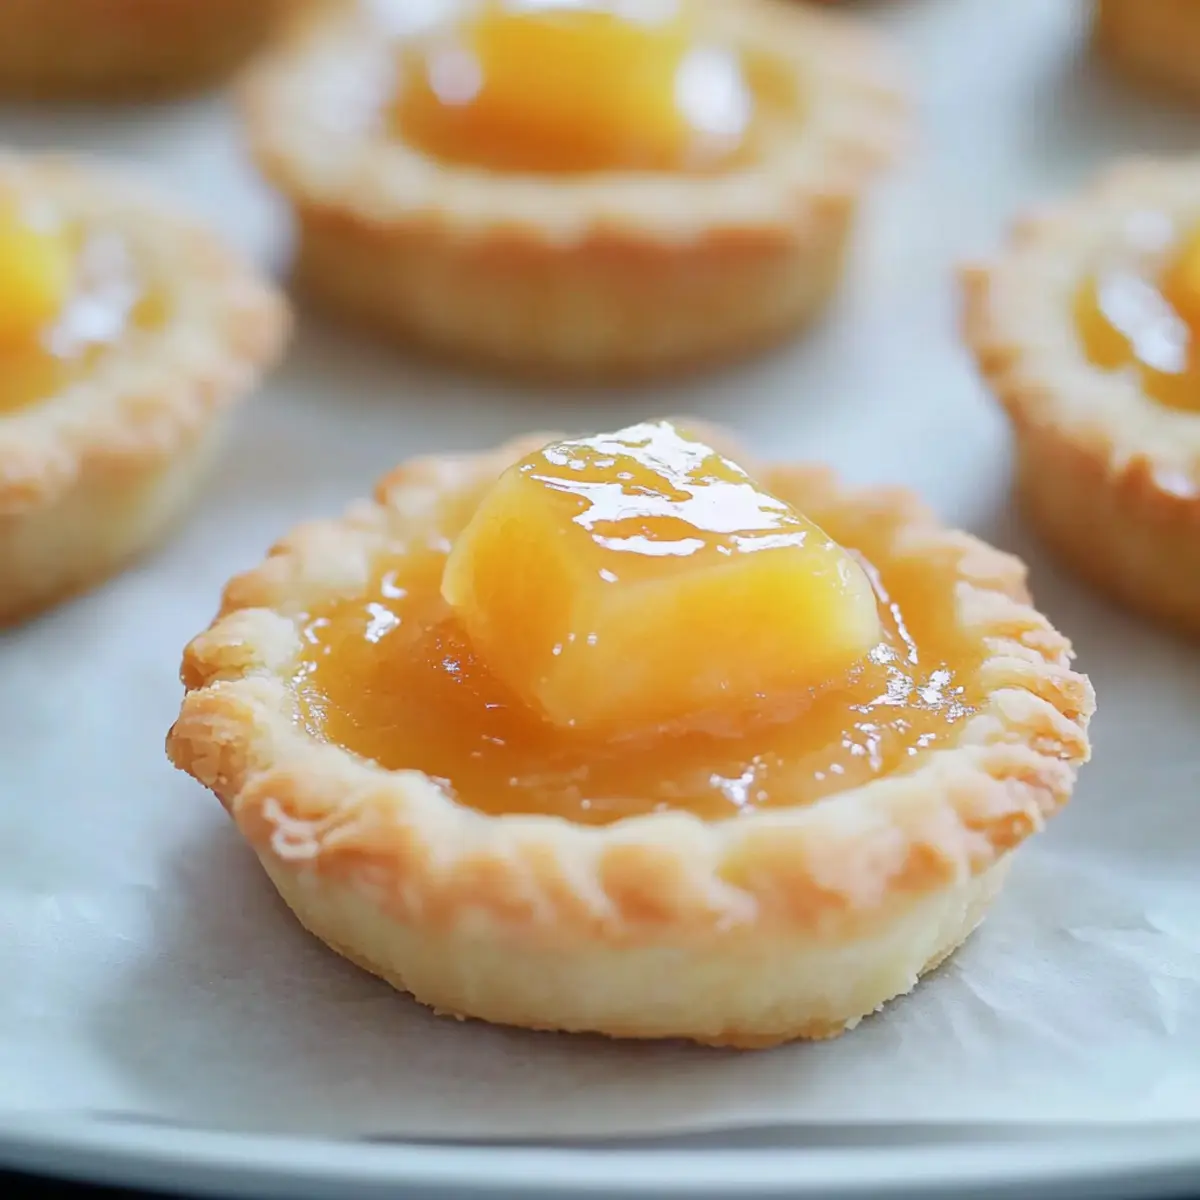
As I was savoring the warmth of the spring sun on my porch, the aroma of fresh pineapple wafted through the air, instantly bringing back memories of festive gatherings and sweet treats. Easter Pineapple Tarts have become a staple in my kitchen, perfectly blending sweet and buttery flavors that dance on your palate. This easy-to-make delicacy features a rich pineapple filling nestled in a flaky pastry, making it a delightful addition to your holiday dessert table. Not only do these tarts impress with their elegant simplicity, but they also offer a comforting taste that pairs beautifully with a cup of tea or coffee. Ready to bring a touch of tradition to your celebrations?

Why Are Easter Pineapple Tarts Irresistible?
Tradition: These tarts are steeped in cultural significance, often enjoyed during festive celebrations, making them a nostalgic treat for many.
Melt-in-Your-Mouth Texture: The combination of a flaky pastry and sweet pineapple filling creates a delightful contrast that’s hard to resist.
Quick to Make: With simple ingredients and straightforward steps, even novice bakers can master this recipe with ease.
Versatile Pairing: Whether served with Earl Grey tea or refreshing vanilla ice cream, these tarts are sure to please any crowd. If you love unique spins on classic recipes, check out my Sticky Pineapple Chicken for more delicious ideas!
Perfect for Sharing: These beauties not only taste divine, but they also look stunning on any dessert table, inviting everyone to indulge.
Easter Pineapple Tarts Ingredients
For the Pineapple Filling
- Pineapple – Use ripe pineapples with golden-brown skin for the sweetest flavor.
- Sugar – Adjust the amount based on the pineapple’s ripeness to ensure the filling isn’t too tart.
For the Dough
- Corn Flour – This adds a light texture; if unavailable, all-purpose flour can work as a substitute.
- All-Purpose Flour – Provides the main structure; using whole wheat can give a nutty twist to your Easter Pineapple Tarts.
- Salt – Enhances the flavor of the pastry, choose between regular or sea salt for a delightful taste.
- Butter – Make sure it’s softened, not melted, to achieve that rich, tender pastry consistency.
- Egg Yolks – These enrich the dough; for a vegan alternative, use a flax egg, though the texture may differ.
Note: Gather all these ingredients to create divine Easter Pineapple Tarts that everyone will love!
Step‑by‑Step Instructions for Easter Pineapple Tarts
Step 1: Prepare Pineapple Filling
Start by peeling and chopping your ripe pineapples into small pieces. Blend them into a smooth puree, then transfer to a saucepan. Add sugar to taste and a cinnamon stick, cooking over medium-low heat. Stir frequently as the mixture thickens into a jam-like consistency, which should take about 1 to 2 hours. Once ready, remove from heat and refrigerate to cool.
Step 2: Make Dough
In a large mixing bowl, combine all-purpose flour, corn flour, salt, and sugar, blending thoroughly. Cut in the softened butter using a pastry cutter or your fingers until the mixture resembles coarse breadcrumbs. Add the egg yolks and knead gently until a smooth, non-sticky dough forms, about 3-5 minutes. If the dough feels too soft, refrigerate for about 20 minutes.
Step 3: Shape Tarts
Preheat your oven to 180°C (356°F). On a lightly floured surface, roll out the chilled dough to about 1 cm thick. Use cookie cutters to cut out desired shapes of your Easter Pineapple Tarts. For the filling, roll your cooled pineapple jam into small balls and place one atop each pastry cut-out, gently pressing down to secure.
Step 4: Bake
Carefully arrange your shaped tarts on a baking tray lined with parchment paper, leaving space between each one. Bake in the preheated oven for approximately 20 minutes or until the tarts turn a beautiful golden brown. Keep a watchful eye towards the end of baking to avoid over-browning, as the smell will be irresistible.
Step 5: Cool and Serve
Once baked, transfer your Easter Pineapple Tarts to a wire rack to cool completely, allowing their flaky texture to set. It’s essential not to rush this step; serve them only once they are fully cooled, ensuring the delightful contrast of buttery pastry and sweet filling is enjoyed to the fullest.

Expert Tips for Easter Pineapple Tarts
-
Perfect Pineapple: Choose ripe, golden-brown pineapples for the sweetest filling. Avoid under-ripe pineapples, which can result in a tart jam.
-
Dough Consistency: Knead the dough just until smooth; over-kneading may cause toughness in your Easter Pineapple Tarts. If too sticky, chill before shaping.
-
Don’t Rush Baking: Keep an eye on your tarts towards the end of the baking time. Overbaking can lead to dry pastries, ruining the delightful texture.
-
Cooling is Key: Allow the tarts to cool completely on a wire rack. Serving them warm might lead to a messy filling and less-than-perfect taste.
-
Taste Test: Bake one tart first to gauge the baking time and oven temperature. This ensures you achieve the perfect golden-brown color for all your tarts.
Make Ahead Options
These delightful Easter Pineapple Tarts are perfect for busy home cooks looking to save time during the holiday season! You can prepare the pineapple filling up to 3 days in advance by blending and simmering it as instructed, then store it in an airtight container in the refrigerator. The pastry dough can also be made ahead of time and chilled for up to 24 hours; just be sure to wrap it tightly to prevent it from drying out. When you’re ready to bake, simply roll out the chilled dough, fill with the prepared filling, and pop them in the oven for a fresh, warm treat that tastes just as delicious as if you’d made them on the spot!
Storage Tips for Easter Pineapple Tarts
Room Temperature: Store your tarts in an airtight container at room temperature for up to 1 week. This keeps them fresh and deliciously flaky.
Fridge: If you prefer, you can refrigerate the tarts for up to 2 weeks. Make sure they are well-wrapped to prevent moisture from making the pastry soggy.
Freezer: For longer storage, freeze your Easter Pineapple Tarts for up to 3 months. To enjoy, let them thaw in the fridge and then gently reheat in the oven for a few minutes.
Reheating: To reheat, preheat your oven to 180°C (356°F), place the tarts on a baking sheet, and warm them for about 10 minutes. This will revive their flaky texture and enhance the delightful pineapple filling.
Easter Pineapple Tarts Variations & Substitutions
Feel free to get creative with these delightful tarts to suit your taste and dietary preferences!
- Fruit Filling: Substitute pineapple with mango or peach puree for a tropical twist that brings new flavors.
- Vegan Option: Use coconut oil instead of butter and incorporate a flax egg to keep this treat plant-based.
- Alternative Flour: For a gluten-free option, swap out all-purpose flour for almond flour or a pre-mixed gluten-free flour blend.
- Sweetness Level: Adjust the sugar in the filling with honey or maple syrup for a more natural sweetener.
- Spicy Kick: Add a pinch of cayenne pepper to the filling for a surprising spicy contrast with the sweetness.
- Herb Infusion: Mix in some finely chopped mint leaves into the filling for an aromatic freshness that livens up every bite.
- Nutty Texture: Sprinkle some toasted coconut flakes or crushed nuts into the pastry dough for extra crunch and richness.
- Citrus Zest: Brighten the overall flavor by adding a teaspoon of lemon or lime zest to the pineapple filling for a delightful zing.
With these variations, every batch of Easter Pineapple Tarts becomes a unique celebration of flavors! You could also draw inspiration from other recipes; if you’re looking for a sweet and savory option, check out my Sticky Pineapple Chicken for an exciting twist! The possibilities are endless!
What to Serve with Easter Pineapple Tarts
Delight in creating a beautiful spread that complements the sweet and buttery flavors of these charming tarts.
- Earl Grey Tea: The fragrant, citrus notes of Earl Grey elevate the tarts, making your afternoon tea experience utterly delightful.
- Vanilla Ice Cream: A scoop of creamy vanilla ice cream balances the sweetness of the tarts, adding a rich, smooth texture to each bite.
Pairing these tarts with a refreshing element is ideal. A simple fruit salad of fresh berries or citrus can add a burst of color and acidity, enhancing the overall dessert experience.
-
Fresh Fruit Salad: A mix of seasonal fruits brightens your plate, providing a refreshing contrast to the buttery richness of the tarts.
-
Coconut Milk Pudding: The creamy texture and subtle sweetness of coconut pudding pair perfectly, inviting guests to savor each flavor.
-
Sparkling Water with Mint: For a refreshing drink, serve sparkling water infused with mint that cleanses the palate and enhances the sweet notes of the tarts.
-
Lemon Tart: If you’re feeling adventurous, a lemon tart provides a zesty kick that pairs surprisingly well with the sweetness of the pineapple filling, striking the perfect balance.
These combinations not only complement your Easter Pineapple Tarts but also create a warm and inviting atmosphere for any gathering. Enjoy!
Easter Pineapple Tarts Recipe FAQs
How do I choose ripe pineapples for the filling?
Absolutely! When selecting pineapples, look for ones with a golden-brown skin that yields slightly when pressed. Avoid those with dark spots or a hard texture. Varieties like Smooth Cayenne or Gold are preferable due to their sweetness.
What is the best way to store Easter Pineapple Tarts?
You can keep your tasty tarts in an airtight container at room temperature for up to 1 week to maintain their brilliant flakiness. For longer storage, refrigerate them for about 2 weeks, ensuring they’re well-wrapped to avoid moisture.
Can I freeze Easter Pineapple Tarts?
Yes, you can freeze your tarts! To do this, place them in a single layer on a baking sheet until frozen solid, then transfer them to an airtight container or a freezer bag. They can be stored in the freezer for up to 3 months. When you’re ready to enjoy them, let them thaw in the fridge and reheat in the oven at 180°C (356°F) for about 10 minutes for that freshly baked taste.
What should I do if my pastry dough is too sticky?
No worries! If you find your dough is too sticky, simply refrigerate it for about 20 minutes. This cooling period allows the butter to firm up, making it easier to handle. When you resume working with the dough, lightly flour your surface to prevent sticking.
Are there any dietary considerations I should keep in mind?
Certainly! For a vegan alternative, substitute egg yolks with a flax egg (1 tablespoon ground flaxseed mixed with 2.5 tablespoons water), although the texture may differ slightly. If allergies are a concern, be sure to check that your flour and other ingredients don’t contain allergens.
What if I want to add a twist to my Pineapple Tarts?
The more the merrier! You can experiment by using other fruit purees, like mango or peach, to create unique flavors. Additionally, consider incorporating spices such as nutmeg or cardamom into the filling for a delightful aromatic enhancement.

Delicious Easter Pineapple Tarts That Melt in Your Mouth
Ingredients
Equipment
Method
- Prepare the Pineapple Filling: Peel and chop the ripe pineapples, blend into a puree, transfer to a saucepan, add sugar and a cinnamon stick, cook over medium-low heat, stirring until thickened, about 1-2 hours.
- Make Dough: Combine all-purpose flour, corn flour, salt, and sugar in a mixing bowl, cut in softened butter until coarse breadcrumbs form, add egg yolks and knead until a smooth dough forms, chill if too soft.
- Shape Tarts: Preheat the oven to 180°C (356°F), roll out the chilled dough, cut desired shapes, place cooled pineapple jam balls on top.
- Bake: Arrange tarts on a baking tray, bake for about 20 minutes until golden brown, keep an eye on them to avoid over-browning.
- Cool and Serve: Transfer baked tarts to a wire rack to cool completely before serving.
Leave a Reply