
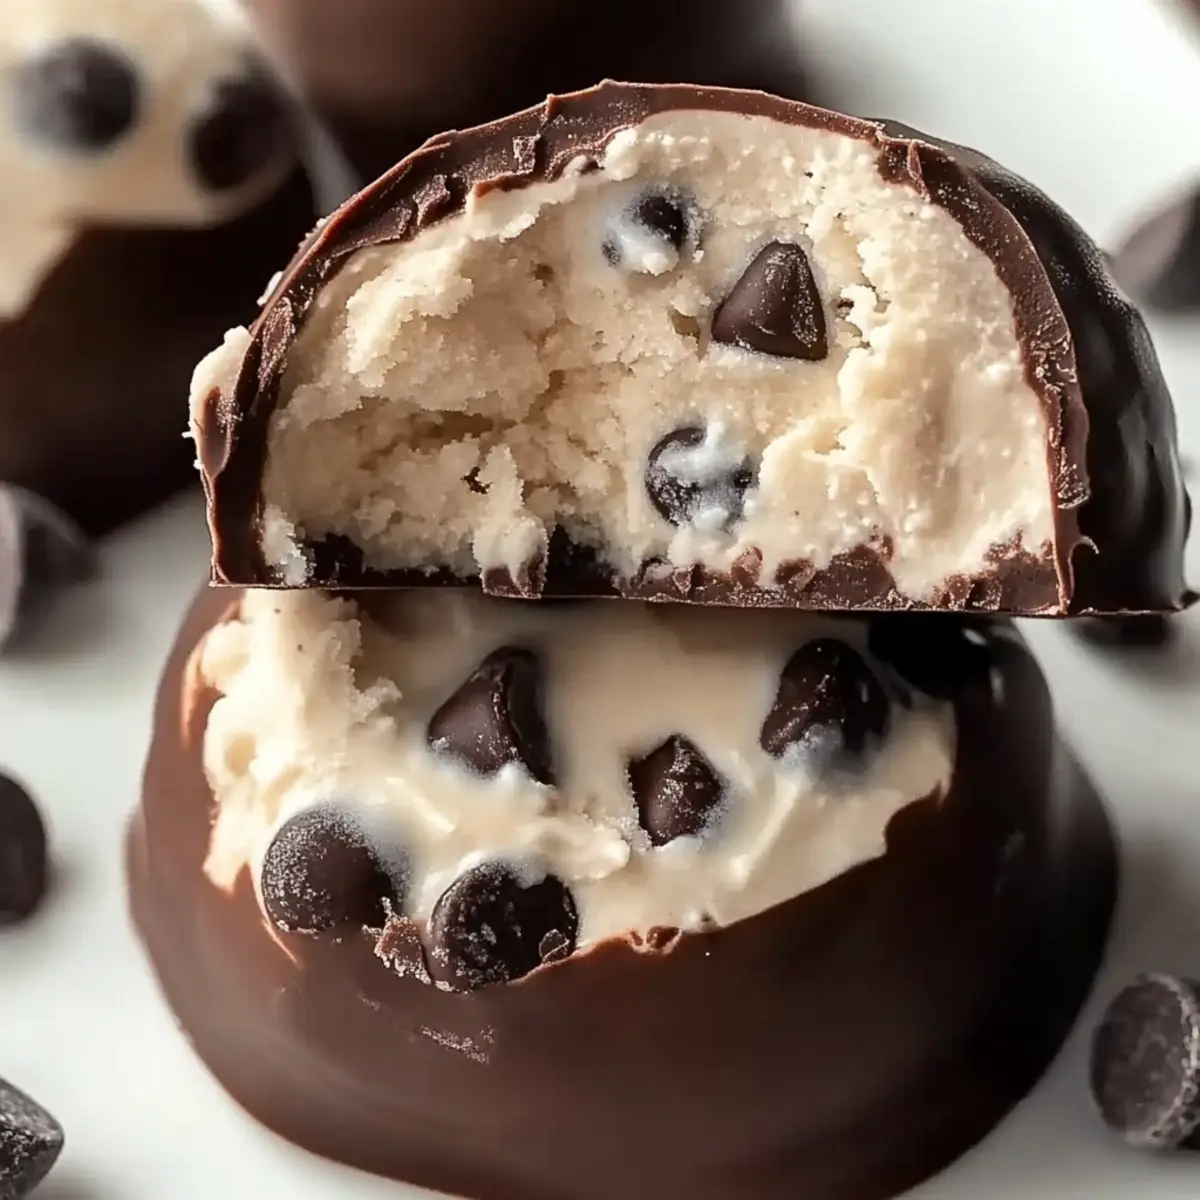
The first taste of summer hits me like a wave of nostalgia with these delightful Cookie Dough Frozen Yogurt Bites. There’s something uniquely satisfying about blending the classic flavors of cookie dough with a refreshing frozen yogurt base, creating a treat that’s as enjoyable as it is guilt-free. Perfect for those sunny afternoons or gatherings with friends, this no-bake recipe is the answer to your dessert cravings without the calorie overload. With quick prep and ingredients that cater to various dietary needs, including gluten-free and vegan options, these bites make indulging feel like pure bliss. Who wouldn’t want a healthy treat that brings back sweet memories while delighting the senses anew? Ready to whip up a batch and share with loved ones? Let’s get started!
Why are Cookie Dough Frozen Yogurt Bites a must-try?
Guilt-Free Delight: These frozen bites combine the best of both worlds, letting you enjoy the beloved taste of cookie dough without the guilt.
Quick & Easy: With no baking required, these tasty treats come together in a jiffy—perfect for busy weekdays.
Versatile Ingredients: Switch up the yogurt flavors or mix in dried fruit for your own spin, making each batch a delightful surprise.
Ideal for Sharing: Great for parties, they are sure to impress friends and family, much like my Greek Yogurt Banana muffins!
Healthy Indulgence: Each bite is around 100 calories, so you can satisfy your sweet tooth while staying on track with your health goals.
Tailored for All: With gluten-free and vegan options, these bites are approachable for any diet, making them a go-to option for everyone!
Cookie Dough Frozen Yogurt Bites Ingredients
For the Yogurt Base
- Non-Dairy Yogurt – Provides the creamy texture; substitute with regular yogurt for a non-vegan option.
- Vanilla Extract – Enhances flavor; use pure vanilla for the best aroma.
- Maple Syrup – Adds natural sweetness; honey can be used as a substitute for non-vegans.
- Protein Powder (optional) – Boosts nutritional value; omit if you prefer a lighter bite.
For the Mix-Ins
- Mini Chocolate Chips – Offers chocolatey bursts; use dairy-free chocolate for vegan options.
For the Coating
- Chocolate Chips – For coating the bites; substitute with vegan chocolate as needed.
- Coconut Oil – Helps chocolate adhere and adds a slight coconut flavor; can be replaced with vegetable oil.
Step‑by‑Step Instructions for Cookie Dough Frozen Yogurt Bites
Step 1: Mix Yogurt Base
In a mixing bowl, combine non-dairy yogurt, vanilla extract, maple syrup, and protein powder (if using). Whisk everything together until the mixture is smooth and creamy, approximately 2-3 minutes. You want to see a luscious, thick consistency that will be perfect for your Cookie Dough Frozen Yogurt Bites.
Step 2: Add Mix-Ins
Gently fold in the mini chocolate chips into the yogurt blend. Use a spatula to ensure the chips are evenly distributed without overmixing, which can cause them to break. In just a minute, you should have a delightful cookie dough mixture, ready to be transformed into frozen treats.
Step 3: Form Bites
Line a baking sheet with parchment paper to prevent sticking. Using a cookie scoop, drop dollops of the yogurt mixture onto the prepared sheet, spacing them about an inch apart. Aim for roughly 1-inch balls so your Cookie Dough Frozen Yogurt Bites are bite-sized and easy to enjoy.
Step 4: Freeze Initial Batch
Place the baking sheet with the yogurt dollops into the freezer and allow them to freeze for at least 1 hour. You’ll know they are ready when they are firm to the touch and hold their shape well. This step sets the foundation for your bite-sized treats.
Step 5: Prepare Chocolate Coating
While the bites freeze, melt the chocolate chips with coconut oil in a microwave-safe bowl. Heat in 30-second intervals, stirring in between, until smooth and glossy—this should take about 1-2 minutes. Ensure there are no lumps left in your melted chocolate for a perfect coating on your Cookie Dough Frozen Yogurt Bites.
Step 6: Dip Bites
Once the bites are solid, remove them from the freezer. Use a fork to dip each frozen yogurt bite into the melted chocolate, ensuring it is completely coated. Let any excess chocolate drip off before placing the coated bites back onto the parchment-lined baking sheet.
Step 7: Set Coating
Return the melted chocolate-coated bites back to the freezer for an additional 30 minutes. This will allow the chocolate to harden completely, making each Cookie Dough Frozen Yogurt Bite a perfect blend of creamy yogurt and chocolatey goodness.
Step 8: Serve or Store
Once set, you can enjoy these treats immediately or transfer them to an airtight container for storage. If stored properly in the freezer, these bites will stay fresh for up to 1 month. Just pull them out when the craving strikes—guilt-free deliciousness is just a bite away!
Make Ahead Options
These Cookie Dough Frozen Yogurt Bites are a lifesaver for busy meal planners! You can prepare the yogurt base and form the bites up to 24 hours in advance; just store them in the freezer on a parchment-lined baking sheet until firm. The chocolate coating can also be prepped in advance and kept in an airtight container at room temperature, ready for when you’re set to finish your treats. When you’re ready to indulge, simply dip the frozen bites into the melted chocolate, return them to the freezer for an additional 30 minutes to set, and voilà! You’ll enjoy these delicious, guilt-free treats with minimal effort, just as delightful as if you’d made them from scratch that day.
What to Serve with Cookie Dough Frozen Yogurt Bites
Delight your taste buds with the perfect accompaniments for the creamy, nostalgic flavors of these cherishable treats.
-
Fresh Berry Medley: A mix of strawberries, blueberries, and raspberries adds a bright, juicy contrast that elevates the sweetness of the bites.
-
Chilled Herbal Tea: Serve these bites with a refreshing mint or chamomile tea for a light, sophisticated pairing that soothes the soul.
-
Crunchy Granola: Sprinkled on top or served on the side, granola adds a satisfying crunch and complements the creamy texture beautifully.
-
Mini Fruit Skewers: Skewers of melons and pineapple provide a fruity burst that balances the richness of the yogurt, making for a colorful presentation.
-
Peanut Butter Drizzle: A warm drizzle of peanut butter over the bites adds a nutty richness that perfectly pairs with their cookie flavor, crafting a sweet echo of your childhood favorites.
-
Non-Dairy Chocolate Milkshake: A creamy chocolate shake intensifies the dessert theme while remaining cohesive with the bite-sized indulgence of the yogurt treats. Enjoy every sip!
How to Store and Freeze Cookie Dough Frozen Yogurt Bites
Fridge: Store Cookie Dough Frozen Yogurt Bites in the refrigerator for up to 3 days in an airtight container, but for best results, keep them in the freezer.
Freezer: To maintain freshness, these bites can be stored in a resealable freezer bag or airtight container for up to 1 month.
Layering: When freezing, place parchment paper between layers of bites to prevent sticking together, making it easy to grab a treat whenever the craving strikes.
Reheating: Enjoy straight from the freezer; there’s no need to thaw. If you find them too firm, let them sit at room temperature for a few minutes before diving in!
Expert Tips for Cookie Dough Frozen Yogurt Bites
-
Chill Before Dipping: Ensure your Cookie Dough Frozen Yogurt Bites are fully frozen before dipping to achieve a smooth, chocolate coating.
-
Maintain Texture: Avoid letting the bites thaw too much before dipping. If they become too soft, they may lose their shape and texture.
-
Quality Ingredients: Opt for high-quality chocolate chips and pure vanilla extract for the richest flavor, elevating your healthy dessert to a new level.
-
Avoid Sogginess: Don’t thaw in the fridge. Allow bites to sit at room temperature for a few moments if needed, preserving their delicious texture.
-
Storage Tips: Store your bites in a single layer in an airtight container with parchment paper between them. This keeps them fresh and prevents sticking.
-
Explore Variations: Customize your Cookie Dough Frozen Yogurt Bites with different mix-ins or yogurt flavors to keep things exciting and cater to your palate!
Cookie Dough Frozen Yogurt Bites Variations & Substitutions
Feeling creative in the kitchen? Here are some delightful ways to personalize your Cookie Dough Frozen Yogurt Bites!
- Dairy-Free: Swap non-dairy yogurt for regular yogurt for a creamy, non-vegan option without losing the delicious flavor.
- Nutty Crunch: Replace mini chocolate chips with chopped nuts for an extra texture punch that adds healthy fats and protein.
- Fruity Twist: Add dried fruits like cranberries or apricots for a sweet and chewy contrast against the creamy yogurt.
- Cinnamon Spice: Sprinkle in a dash of cinnamon for a warm flavor that brings a cozy touch to your frozen treats.
- Coconut Bliss: Toasted shredded coconut can be added for a tropical flair, giving these bites a delicious, chewy texture.
- Extra Chocolatey: Use chocolate-flavored yogurt or opt for dark chocolate chips for those who can’t get enough of that rich chocolatey goodness.
- Flavor-Fusion: Experiment with Greek yogurt for a protein boost, or try flavored yogurts such as vanilla bean or coconut for a new dining experience, reminiscent of my Lemon Blueberry Bites.
- Spicy Kick: For a surprising twist, add a pinch of cayenne pepper or chili powder to the chocolate coating for a sweet and spicy contrast.
With so many creative variations, make each batch uniquely yours while indulging in the nostalgia of cookie dough!
Cookie Dough Frozen Yogurt Bites Recipe FAQs
What kind of yogurt should I use for Cookie Dough Frozen Yogurt Bites?
Absolutely! You can use any non-dairy yogurt for a vegan version, or regular yogurt if you prefer non-vegan. Look for unsweetened varieties to control the sweetness and keep those calories in check. Creamy options like coconut or almond yogurt will give you a rich texture, making your bites even more delightful!
How do I store my Cookie Dough Frozen Yogurt Bites?
To keep your Cookie Dough Frozen Yogurt Bites fresh, store them in an airtight container or a resealable freezer bag, and they will last in the freezer for up to 1 month. If you’re storing them long-term, layer parchment paper between the bites to prevent them from sticking together, ensuring each treat is easily accessible when the craving hits.
Can I freeze these Cookie Dough Frozen Yogurt Bites?
Definitely! These delightful bites are perfect for freezing. Simply follow the recipe, and once you’ve shaped them and they’re frozen solid, you can store them in an airtight container or folder in a freezer bag. They’ll stay fresh for about 1 month. Just remember, there’s no need to thaw them before eating—enjoy them straight from the freezer for a refreshing treat!
What if my chocolate coating isn’t smooth?
Very! If your chocolate coating isn’t smooth, try melting the chocolate chips and coconut oil together using the double boiler method instead of the microwave. This method allows for even heating and less risk of burning the chocolate. If you still notice lumps, you can add a teaspoon of coconut oil or vegetable shortening to help smooth out the mixture.
Are Cookie Dough Frozen Yogurt Bites safe for pets and those with allergies?
Always a good question! These treats are generally safe for humans, but you should not share them with pets. Chocolate, particularly dark chocolate, is toxic to dogs. If you’re making these for someone with allergies, be mindful of potential cross-contamination and ingredients like nuts or gluten in the chocolate. Always check your labels to ensure your treats are safe for everyone.
How can I make these bites even healthier?
For a healthier twist, you could use Greek yogurt for added protein or add some chia seeds for fiber. To cut down on added sugars, you can reduce the maple syrup or use a sugar substitute that fits your dietary preferences. Additionally, consider incorporating protein powder to make them even more nutritious if you’re looking for a post-workout snack!
Cookie Dough Frozen Yogurt Bites: Guilt-Free Indulgence
Ingredients
Equipment
Method
- In a mixing bowl, combine non-dairy yogurt, vanilla extract, maple syrup, and protein powder (if using). Whisk everything together until the mixture is smooth and creamy, approximately 2-3 minutes.
- Gently fold in the mini chocolate chips into the yogurt blend. Use a spatula to ensure the chips are evenly distributed without overmixing.
- Line a baking sheet with parchment paper to prevent sticking. Using a cookie scoop, drop dollops of the yogurt mixture onto the prepared sheet.
- Place the baking sheet with the yogurt dollops into the freezer and allow them to freeze for at least 1 hour.
- While the bites freeze, melt the chocolate chips with coconut oil in a microwave-safe bowl, heating in 30-second intervals until smooth and glossy.
- Once the bites are solid, remove them from the freezer. Use a fork to dip each frozen yogurt bite into the melted chocolate.
- Return the melted chocolate-coated bites back to the freezer for an additional 30 minutes to allow the chocolate to harden completely.
- Once set, enjoy these treats immediately or transfer them to an airtight container for storage.
Leave a Reply