
There’s something magical about balancing creamy sweetness with a burst of fruitiness, and that’s precisely what you’ll experience with my White Chocolate Raspberry Dream Cake. As I whipped up this cake in my kitchen, the scent of melting white chocolate mingled with fresh raspberries filled the air, instantly transporting me to a warm, inviting place. This recipe embraces the best of both worlds: it’s irresistibly easy to make and perfect for impressing your guests at any gathering. With a soft crumb that melts in your mouth and a bright, zesty punch from the berries, this decadent dessert is bound to delight anyone who takes a slice. Curious how to create this heavenly treat in your own kitchen? Let’s dive into the recipe!

Why is this cake a dream dessert?
Easy to Make: This White Chocolate Raspberry Dream Cake simplifies dessert-making, requiring only basic baking skills and a handful of ingredients.
Irresistibly Fluffy: Each slice boasts a tender crumb that melts in your mouth, perfectly complementing the tartness of the raspberries.
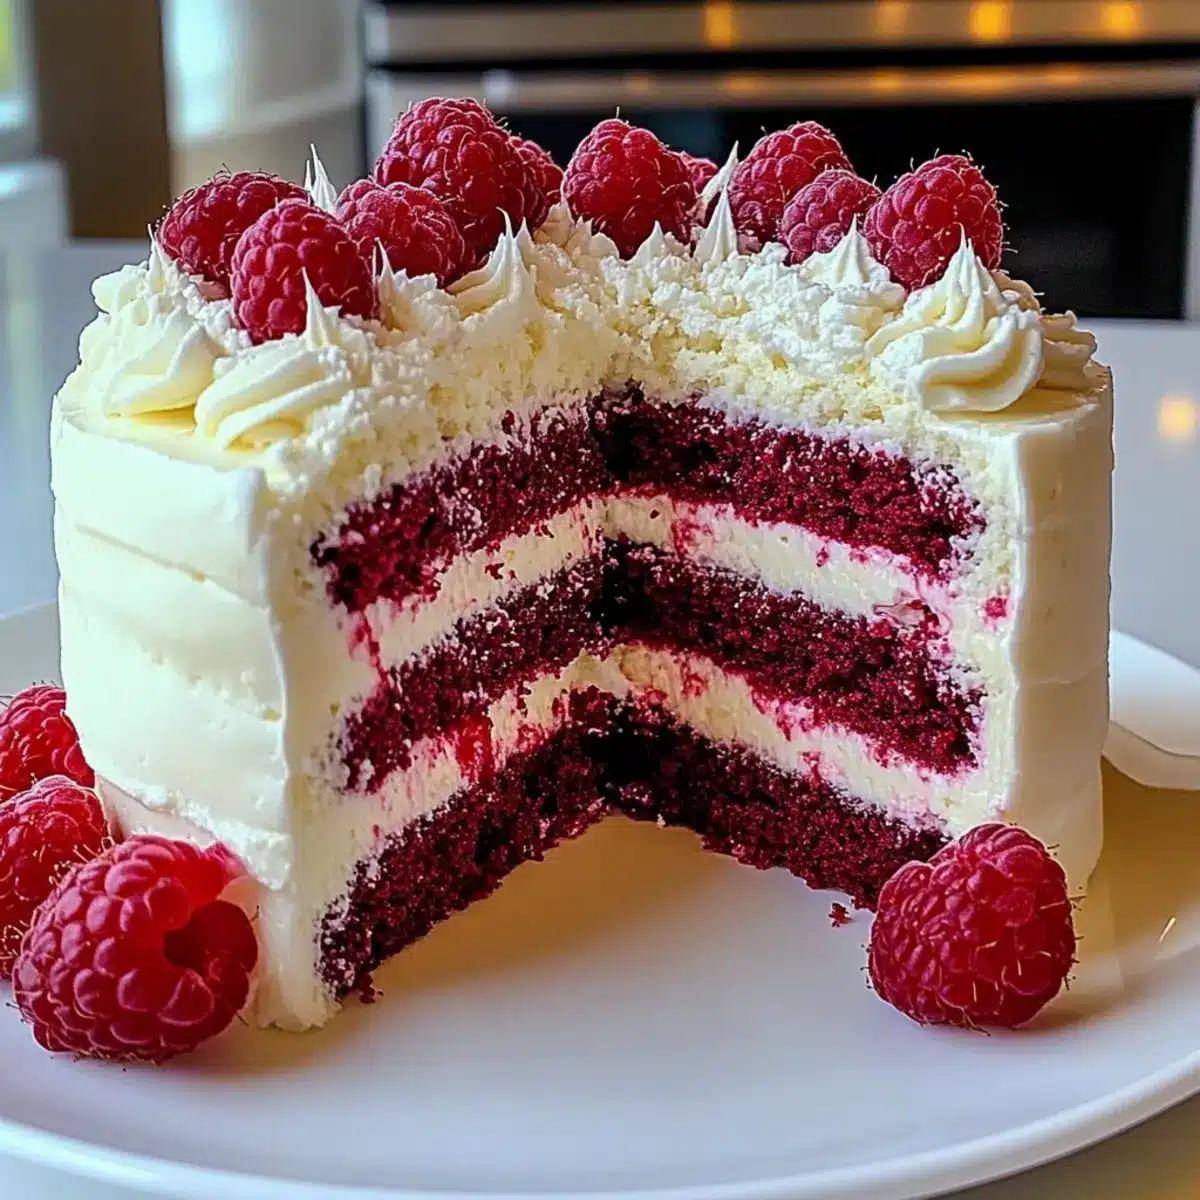
Visually Stunning: Garnished with white chocolate shavings and fresh raspberries, its vibrant appearance makes it a showstopper on any table.
Versatile Occasions: Whether it’s a birthday party, brunch, or a quiet tea time, this cake delights in every setting. Explore other delightful treats like Chocolate Peanut Butter Banana Bread.
Make-Ahead Friendly: Pre-bake this cake for stress-free entertaining. Wrap slices for freshness, or enjoy it warm after a quick microwave reheat!
White Chocolate Raspberry Dream Cake Ingredients
For the Cake
• All-purpose flour – Structure is key; use a light hand to maintain a tender crumb.
• Baking powder – This leavening agent ensures the cake rises evenly and beautifully.
• Baking soda – Adds extra lift for a light texture, essential for this dreamy dessert.
• Salt – A flavor enhancer that keeps the sweetness in check for a balanced taste.
• Unsalted butter (softened) – Adds rich moistness and blends smoothly into the batter.
• Granulated sugar – Contributes the sweetness that makes each bite irresistible.
• Eggs – Essential for structure and binding; use large, room temp eggs for best results.
• Vanilla extract – Adds a depth of flavor that wonderfully complements the cake’s sweetness.
• Buttermilk – Keeps the cake fluffy while providing a gentle tang.
• Sour cream – This creamy ingredient enhances moisture and balances out the sweetness.
• White chocolate chips (melted) – Incorporates a rich, smooth texture throughout the cake.
• Raspberries (fresh or frozen) – These juicy berries provide brightness and flavor bursts.
For Garnishing
• White chocolate shavings & fresh raspberries (optional) – Use these to elevate presentation and boost flavor with added texture.
This White Chocolate Raspberry Dream Cake is bound to be a showstopper at your next gathering!
Step‑by‑Step Instructions for White Chocolate Raspberry Dream Cake
Step 1: Preheat and Prepare
Begin by preheating your oven to 350°F (175°C). Grease two 9-inch round cake pans with butter or non-stick spray, and line the bottoms with parchment paper for easy removal. This preparation ensures that your White Chocolate Raspberry Dream Cake has a beautiful finish and won’t stick to the pans.
Step 2: Mix Dry Ingredients
In a large mixing bowl, whisk together the all-purpose flour, baking powder, baking soda, and salt. This combination of dry ingredients creates the perfect structure for your cake. Set this bowl aside while you focus on the wet ingredients, making sure you have everything ready for a smooth blending process.
Step 3: Cream Butter and Sugar
In another bowl, beat the softened unsalted butter and granulated sugar together using an electric mixer on medium speed. Continue mixing for about 3-4 minutes until the mixture is light and fluffy, turning a pale shade. This step is essential for incorporating air into your batter, ensuring a light texture for your White Chocolate Raspberry Dream Cake.
Step 4: Incorporate Eggs and Vanilla
Add the eggs one at a time to the butter-sugar mixture, beating well after each addition. Pour in the vanilla extract and mix until thoroughly combined. The eggs will help bind all the ingredients, contributing to the cake’s moistness, while the vanilla brings a depth of flavor that enhances the cake.
Step 5: Combine Wet Ingredients
Next, incorporate the buttermilk, sour cream, and melted white chocolate into the mixture, stirring gently until everything is smooth and well-blended. This combination adds moisture and richness to your batter. It’s important the melted chocolate is not too hot to avoid cooking the eggs; let it cool slightly if needed.
Step 6: Add Dry Ingredients to Mixture
Gradually mix in the dry ingredients with the wet mixture. Stir until just combined; it’s okay if there are a few flour streaks remaining. Overmixing can lead to a dense cake, so be gentle. This careful blending ensures a tender crumb for your White Chocolate Raspberry Dream Cake.
Step 7: Fold in Raspberries
Gently fold in the fresh or frozen raspberries. Take care not to over-mix, as you want to maintain the integrity of the berries without breaking them down. This step adds delightful bursts of tartness to each bite of your cake, balancing perfectly with the sweetness of the white chocolate.
Step 8: Bake the Cake
Divide the batter evenly between the prepared cake pans. Bake in your preheated oven for 25-30 minutes, or until a toothpick inserted into the center comes out clean. The cakes should be golden brown on top, giving a slight spring when touched.
Step 9: Cool the Layers
Once baked, allow the cakes to cool in the pans for about 10 minutes. Then carefully remove them from the pans and transfer them to a wire rack to cool completely. This cooling step is crucial to prevent the cake from becoming soggy before frosting, ensuring your White Chocolate Raspberry Dream Cake has a nice texture.
Step 10: Frost and Garnish
After the cake layers have cooled completely, frost between the layers and on top with your favorite icing. For a lovely presentation, garnish with white chocolate shavings and a few fresh raspberries. This embellishment adds a touch of elegance, making your dessert as visually stunning as it is delicious.
How to Store and Freeze White Chocolate Raspberry Dream Cake
Room Temperature: Store the cake covered loosely with plastic wrap or a cake dome for up to 1 day. This helps maintain its soft texture and prevents it from drying out.
Fridge: If you need to keep the cake longer, place it in an airtight container in the fridge for up to 4 days. This keeps the cake fresh while maintaining its dreamy flavor profile.
Freezer: For extended storage, wrap individual slices tightly in plastic wrap, then place them in a freezer bag. Enjoy your cake for up to 3 months without sacrificing taste!
Reheating: To savor the fresh-baked taste, reheat slices in the microwave for about 10-15 seconds, just until warm.
White Chocolate Raspberry Dream Cake Variations
Feel free to get creative with your cake—there are plenty of delightful ways to twist this recipe!
-
Gluten-Free: Substitute almond flour for the all-purpose flour, maintaining the same texture without gluten. This allows everyone to enjoy the cake without worry.
-
Extra Fruity: Fold in raspberry jam swirls before baking for a luscious jammy surprise. The added burst of raspberry makes each bite even more exciting!
-
Chocolatey Twist: Use milk chocolate chips instead of white chocolate for a richer, more cocoa-forward flavor. This simple swap creates a completely new dessert experience that chocolate lovers will adore.
-
Cream Cheese Frosting: Switch up your frosting by using cream cheese frosting instead of traditional buttercream. This tangy creaminess pairs beautifully with the sweet cake and fresh raspberries.
-
Nutty Delight: Add chopped almonds or pecans for a delicious crunch. Toss them in the batter gently before baking for added texture and flavor.
-
Spiced Cake: Introduce a pinch of cinnamon and nutmeg to the dry ingredients for a warm, spiced flavor. This twist adds depth and sets your cake apart during cooler months.
-
Layered Creation: Make this cake a layered masterpiece by baking in three 9-inch pans instead of two. Fill with a white chocolate mousse or raspberry cream between layers for a stunning presentation!
If you’re looking for more inspiration, consider making a batch of Chocolate Peanut Butter Banana Bread or trying out some delicious Chocolate Overnight Oats for a breakfast treat.
What to Serve with White Chocolate Raspberry Dream Cake
Indulge in the ultimate dessert experience by enhancing your meal with delightful pairings that elevate every bite of this enchanting cake.
-
Fresh Berries: A medley of mixed berries adds tangy freshness that enhances the cake’s sweet and tart flavor profile.
-
Whipped Cream: Light and airy, a dollop of freshly whipped cream complements the richness of the white chocolate, creating a luxurious mouthfeel.
-
Vanilla Ice Cream: The creaminess of vanilla ice cream pairs beautifully with the cake’s fluffy texture, creating a classic and comforting dessert duo.
-
Coffee or Espresso: A robust cup of coffee balances the sweetness of the cake, offering a warm, inviting contrast that enhances the overall flavor experience.
-
Moscato Wine: This sweet, sparkling wine adds a festive touch to your dessert table, harmonizing perfectly with the fruity raspberry notes.
-
Chocolate Ganache: For a decadent twist, drizzle warm chocolate ganache over the cake, adding depth and an indulgent contrast to the sweet, creamy layers.
-
Lemon Sorbet: The refreshing citrus notes of lemon sorbet cleanse the palate and offer a light finish that beautifully offsets the cake’s richness.
Expert Tips for White Chocolate Raspberry Dream Cake
-
Parchment Perfection: Use parchment paper in the pans to ensure easy cake release and prevent sticking.
-
Room Temperature Ingredients: Bring all ingredients to room temperature for smoother mixing and better emulsification, leading to a softer texture.
-
Avoid Overmixing: Mix the batter just until combined after adding the flour. Overmixing can result in a dense, tough cake.
-
Don’t Skimp on Cooling: Allow the cakes to cool in the pans briefly, then transfer to a rack. This prevents a soggy base and maintains texture.
-
Layering with Flavor: Consider adding a raspberry jam swirl for an additional burst of flavor that harmonizes beautifully with the white chocolate.
-
Storage Savvy: Store leftovers in an airtight container for up to 4 days, or freeze slices to enjoy a delightful treat anytime!
Make Ahead Options
These White Chocolate Raspberry Dream Cake elements are perfect for meal prep enthusiasts! You can bake the cake layers up to 3 days in advance; simply cool them completely, wrap each layer tightly in plastic wrap, and store in the refrigerator. The individual layers retain their incredible moisture and flavor when stored this way. If you prefer, you can also slice the cake and keep the pieces in an airtight container for up to 4 days. When you’re ready to serve, frost and garnish with white chocolate shavings and raspberries just before enjoying. This makes it a breeze to impress guests on short notice while ensuring your cake is just as delightful as fresh-baked!

White Chocolate Raspberry Dream Cake Recipe FAQs
What type of raspberries should I use for this cake?
Absolutely, I recommend using fresh raspberries when they are in season for the best flavor. However, if fresh isn’t available, frozen raspberries work just fine! Just be sure to fold them in gently so they don’t break down too much—nobody wants a soggy cake.
How should I store my White Chocolate Raspberry Dream Cake?
Store your cake at room temperature, loosely covered with plastic wrap for up to 1 day to maintain its delightful texture. For longer storage, place it in an airtight container and refrigerate for up to 4 days. This ensures that every slice remains fresh and tasty for your enjoyment!
Can I freeze my leftovers?
Absolutely! To freeze, wrap individual slices tightly in plastic wrap, then place them in a freezer bag. This way, you can enjoy your White Chocolate Raspberry Dream Cake for up to 3 months! When you’re ready to indulge once more, simply reheat in the microwave for about 10-15 seconds for a fresh-baked taste.
What do I do if my cake is too dense?
If you find that your cake has turned out denser than you expected, it’s likely you may have overmixed the batter—this can happen if you mix after adding the flour. Next time, mix just until the ingredients are combined, and don’t be afraid to leave a few flour streaks. A gentle folding technique when adding ingredients will give you that lovely fluffy texture you crave!
Are there any allergy considerations for this recipe?
Yes! This cake contains common allergens like gluten (from all-purpose flour), dairy (in buttermilk, sour cream, and butter), and eggs. If you’re baking for someone with gluten intolerance, consider using almond flour or a gluten-free blend. For dairy-free options, you can substitute with non-dairy milk and yogurt equivalents. Always ensure you check product labels to ensure they are safe for your needs.
How long does the cake last once it’s frosted?
Once frosted, your White Chocolate Raspberry Dream Cake will stay fresh in an airtight container in the fridge for up to 4 days. Just make sure it’s well-covered to preserve that beautiful frosting and prevent it from absorbing any smells from the fridge!

White Chocolate Raspberry Dream Cake That Steals the Show
Ingredients
Equipment
Method
- Preheat your oven to 350°F (175°C) and prepare two 9-inch round cake pans.
- In a mixing bowl, whisk together flour, baking powder, baking soda, and salt.
- Beat the softened butter and granulated sugar together until light and fluffy.
- Incorporate eggs one at a time, then mix in the vanilla extract.
- Stir in buttermilk, sour cream, and melted white chocolate until smooth.
- Gradually combine the dry ingredients into the wet mixture until just combined.
- Gently fold in the raspberries without breaking them.
- Divide batter between prepared pans and bake for 25-30 minutes.
- Let cakes cool for 10 minutes in pans before transferring to a wire rack.
- Frost between layers and on top; garnish with chocolate shavings and raspberries.
Leave a Reply