
The moment those golden-brown, crispy edges start to peek out from the oven, a wave of nostalgia washes over me—it’s cookie time! Today, I’m thrilled to share my recipe for Classic Chewy Chocolate Chip Cookies, a delightful treat that perfectly balances a warm, gooey center with a touch of crunch. These cookies are not just quick to whip up; they’re also a guaranteed crowd-pleaser, making them ideal for any occasion—whether you’re hosting a gathering or just craving a sweet escape. Plus, with endless variations to explore, you can customize them with your favorite chocolate types or even mix in some nuts for an extra crunch. Are you ready to transform your kitchen into a chocolate chip wonderland? Let’s dive in!
Why Are These Cookies So Irresistible?
Chewy Perfection: These classic chocolate chip cookies offer an incredible balance of a warm, gooey center and slightly crisp edges that melt in your mouth.
Endless Customization: Feeling adventurous? You can easily switch up the chocolate types or add nuts for an added crunch, making a unique treat every time!
Quick & Easy: With just a handful of ingredients and straightforward steps, you can whip these up in no time, perfect for unexpected guests or a sweet midnight snack.
Crowd-Pleaser: No one can resist the allure of freshly baked cookies, whether at parties or family gatherings—these will be the star!
Make Ahead: Store cookie dough in the freezer and bake fresh cookies anytime you want, just like our delicious Chicken Crescent Roll options, guaranteeing you’ll never be caught without a sweet treat.
Get ready to enjoy the delightful aroma and the satisfaction that comes from making homemade cookies!
Classic Chewy Chocolate Chip Cookie Ingredients
• Discover the delightful ingredients that bring these cookies to life!
For the Cookie Dough
- All-purpose flour – Provides structure and texture; feel free to substitute with whole wheat flour for a denser cookie.
- Baking soda – Acts as a leavening agent that helps cookies rise; ensure it’s fresh for the best results.
- Salt – Enhances flavor and balances sweetness; try sea salt for a delightful crunch.
- Unsalted butter – Adds richness and flavor; substitute with coconut oil for a creamy, dairy-free option.
- Brown sugar – Contributes to moisture and chewiness; light brown sugar can replace dark for a milder taste.
- Granulated sugar – Adds sweetness and aids in the cookie’s spread; turbinado sugar can add a hint of delightful crunch.
- Eggs – Binds the ingredients together; for egg-free cookies, consider using flaxseed meal as a perfect alternative.
- Vanilla extract – Adds inviting depth of flavor; opt for pure vanilla for a more intense taste experience.
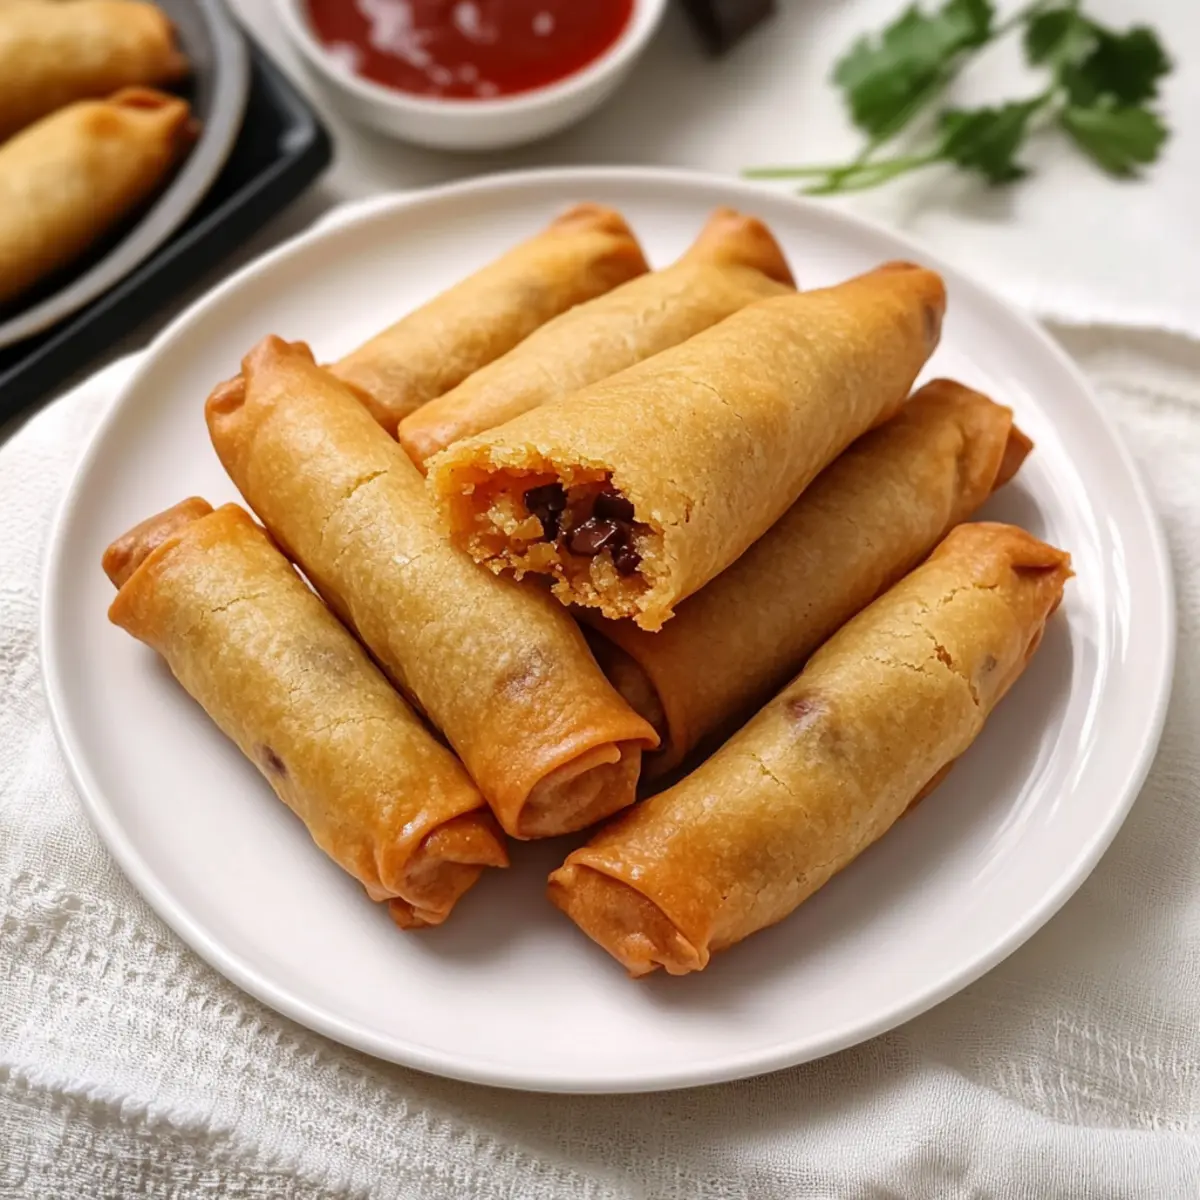
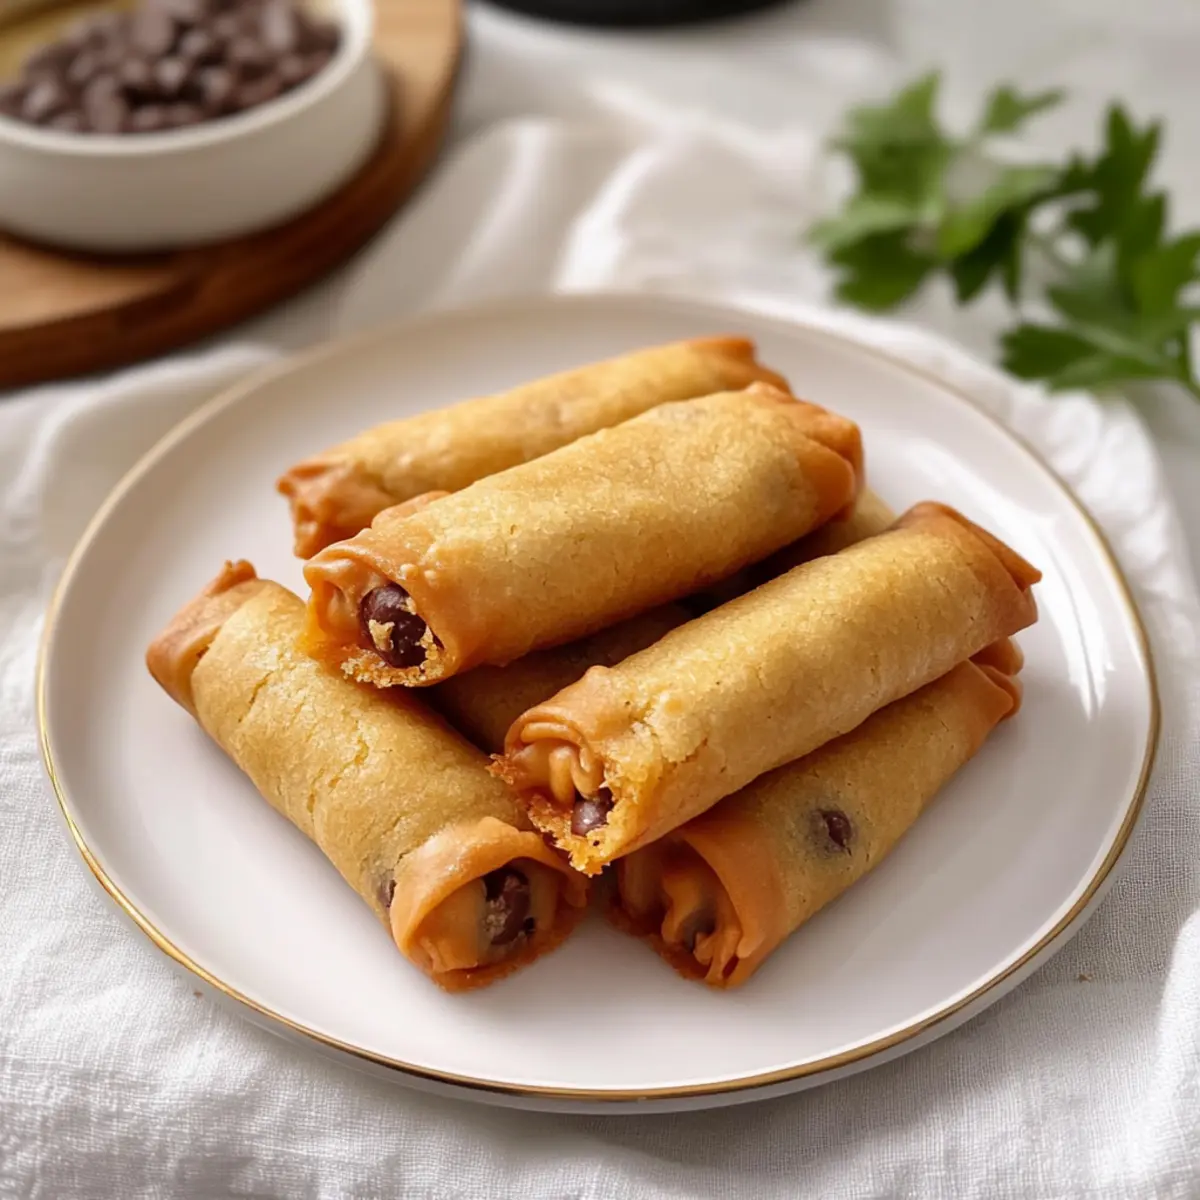
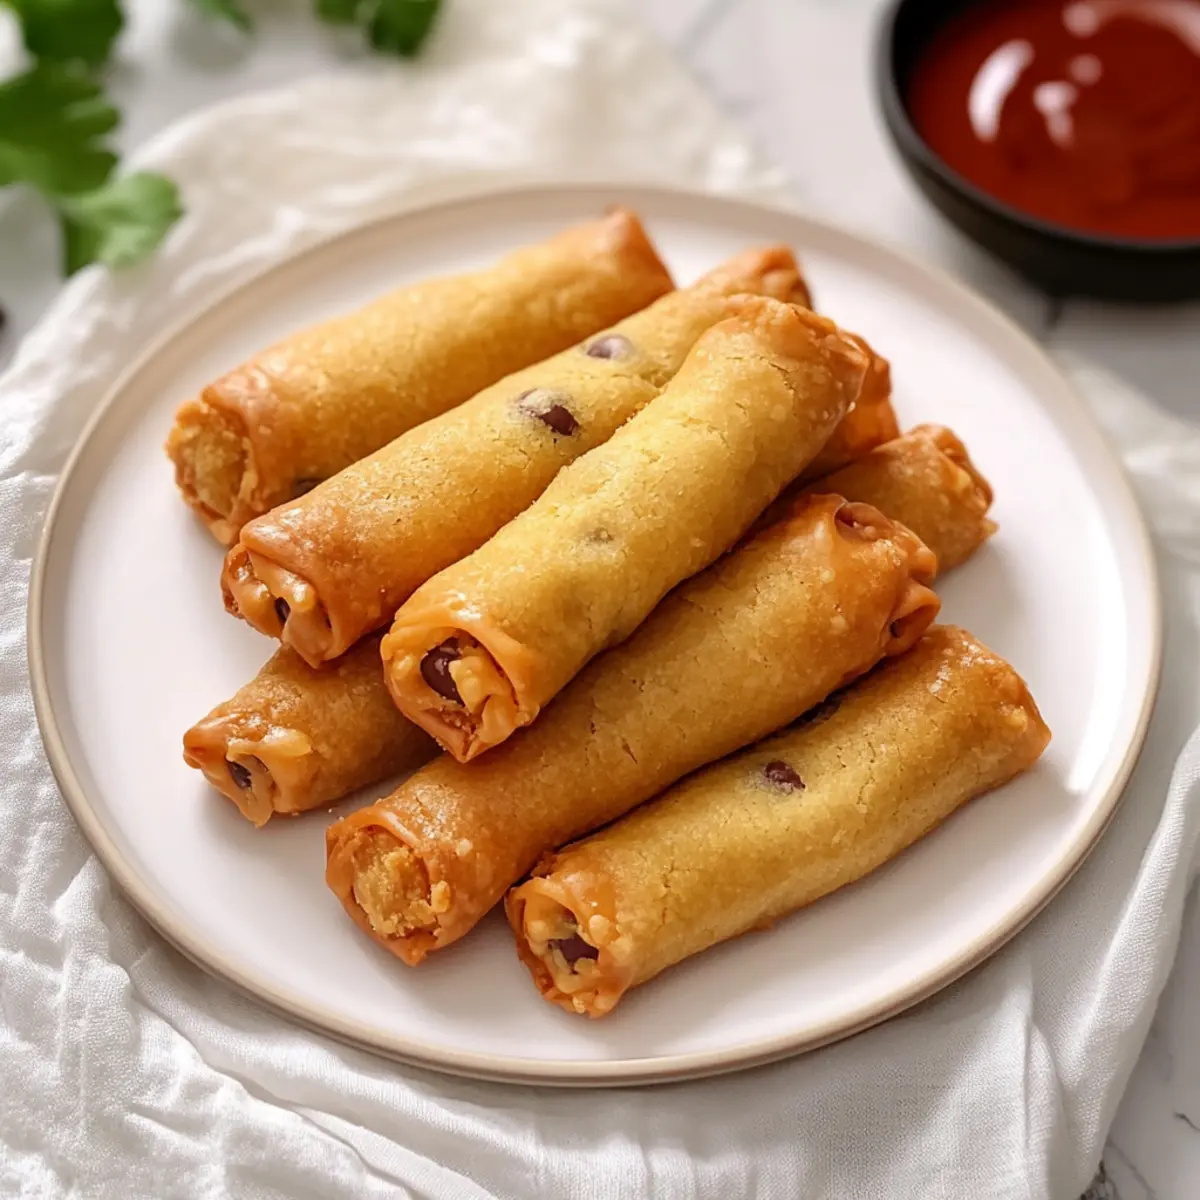
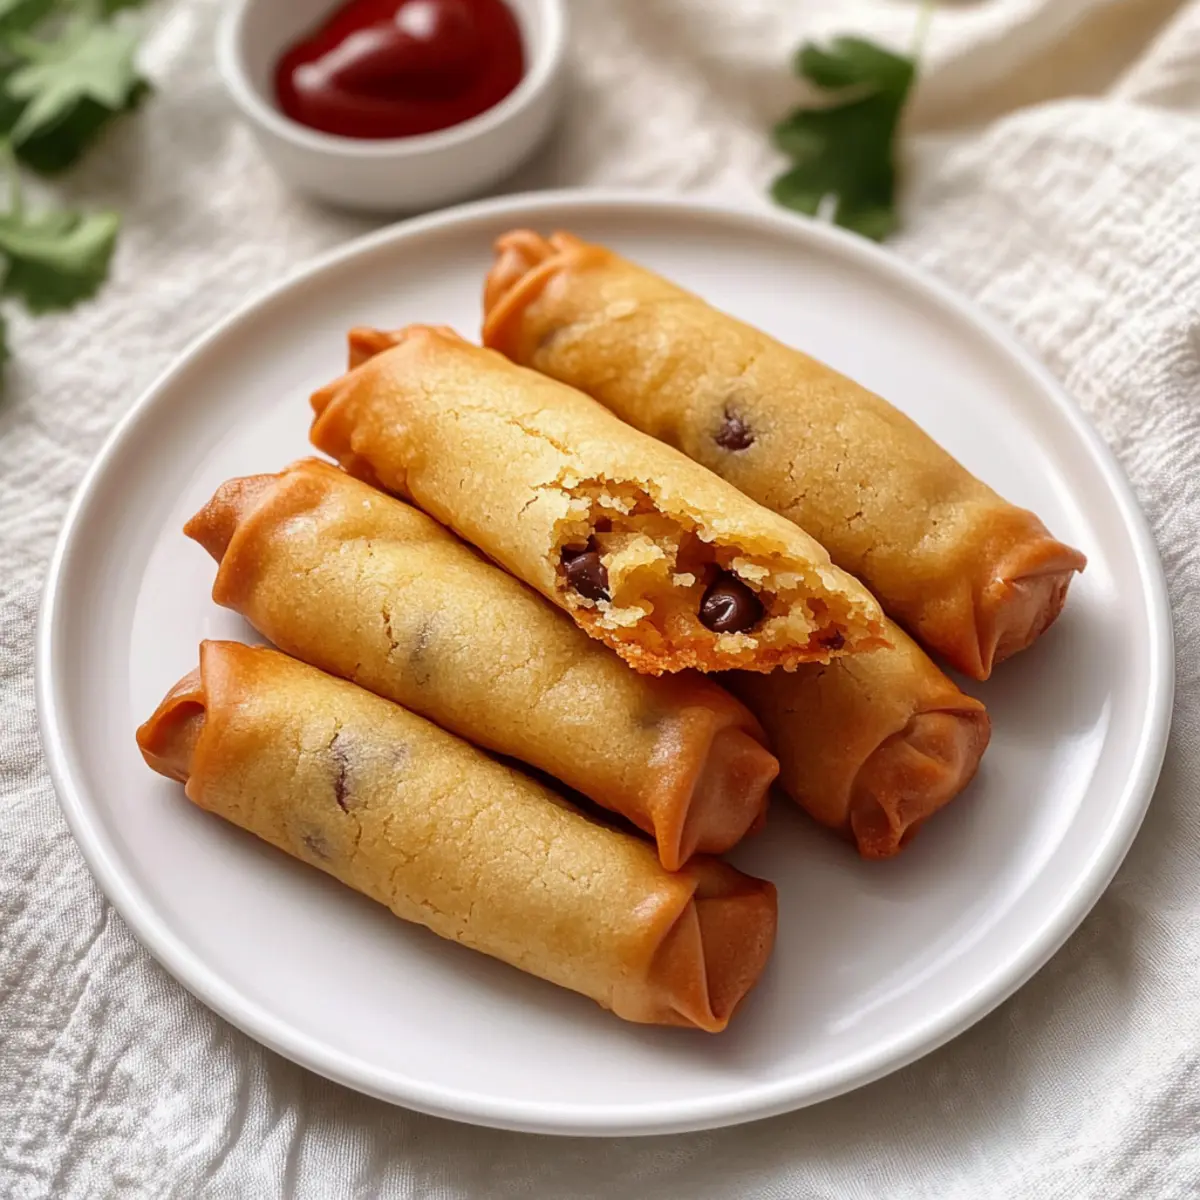
- Chocolate chips – The stars of the recipe! Combine semi-sweet and milk chocolate for a balanced taste, or go darker for a more intense flavor.
Optional Add-Ins
- Chopped nuts – For an extra crunch, add walnuts or pecans to the mix!
- Dried fruit – Throw in some cranberries or raisins for a chewy, sweet burst.
- Flavored chocolate chips – Get creative with mint or butterscotch chips to give a unique twist to your Chocolate Chip Cookie journey.
With these classic ingredients at your fingertips, you’re all set to embark on your cookie-baking adventure. Happy baking!
Step‑by‑Step Instructions for Classic Chewy Chocolate Chip Cookies
Step 1: Preheat the Oven
Begin by preheating your oven to 350°F (175°C) to create the perfect baking environment for your chocolate chip cookies. While the oven heats, line a baking sheet with parchment paper. This will prevent your cookies from sticking, ensuring they bake evenly and come off the sheet beautifully when it’s time to enjoy.
Step 2: Mix Dry Ingredients
In a medium-sized bowl, whisk together 2 cups of all-purpose flour, 1 teaspoon of baking soda, and ½ teaspoon of salt until well combined. This step is crucial for achieving the right texture in your classic chewy chocolate chip cookies. Set your dry mixture aside to allow the flavors to meld, which will enhance your cookie’s overall taste.
Step 3: Cream the Butter and Sugars
In a separate large mixing bowl, cream together ¾ cup of softened unsalted butter, ¾ cup of brown sugar, and ½ cup of granulated sugar using an electric mixer. Beat the mixture on medium speed for about 2-3 minutes, until it’s light and fluffy. This process incorporates air into the butter, which helps your cookies achieve that delightful chewy texture.
Step 4: Add Eggs and Vanilla
Beat in 2 large eggs, one at a time, ensuring each egg is fully incorporated before adding the next. Then, stir in 1 teaspoon of pure vanilla extract until everything is well blended. The warm aromas of vanilla will fill your kitchen, enhancing the rich flavor profile of your classic chewy chocolate chip cookies.
Step 5: Combine Wet and Dry Ingredients
Gradually add the flour mixture to the wet ingredients, stirring with a spatula until just combined. Be careful not to overmix, as this can lead to tough cookies! Once you no longer see dry flour, your dough is ready for the delicious chocolate chips that will make these cookies irresistible.
Step 6: Fold in Chocolate Chips
Gently fold in 1 to 2 cups of your favorite chocolate chips—mixing semi-sweet and milk chocolate creates a wonderful balance of flavor. Aim for an even distribution throughout the dough for that perfect chocolaty bite in each cookie. The melted chocolate will be a delightful surprise with every chewy bite.
Step 7: Portion the Dough
Using a tablespoon or cookie scoop, drop rounded portions of dough onto your prepared baking sheet, leaving about 2 inches between each for spreading. This will help prevent your cookies from merging into one another during baking. The anticipation of those cookies rising is just delightful!
Step 8: Bake the Cookies
Place the baking sheet in the preheated oven and bake for 10-12 minutes, watching closely for the edges to turn golden brown while the centers look slightly underbaked. This is the perfect baking time for classic chewy chocolate chip cookies, ensuring that they remain soft in the middle while developing a satisfying edge.
Step 9: Cool and Transfer
Once baked, remove your cookies from the oven and let them cool on the baking sheet for about 5 minutes. This resting time is essential as it allows the cookies to set, preventing them from breaking apart when transferring. After cooling briefly, move them to a wire rack to cool completely, and admire your homemade creation!
Expert Tips for Classic Chewy Chocolate Chip Cookies
Don’t Overmix: Avoid tough cookies by mixing the dough just until the flour is combined; overmixing can develop gluten.
Chill the Dough: For cookies that retain their shape better, chill the dough for at least 30 minutes before baking. This helps create a thicker texture.
Measure Flour Correctly: Spoon flour into your measuring cup instead of scooping it directly, which can pack it down and result in dry cookies.
Use Quality Chocolate: Opt for high-quality chocolate chips or bars for a rich flavor. Mixing different types of chocolate can elevate your cookies vastly.
Cool Properly: Let cookies cool on the baking sheet for a few minutes before transferring to a wire rack to set properly and avoid breaking apart.
With these tips, you’ll ensure your Classic Chewy Chocolate Chip Cookies are a warm, gooey success!
Variations & Substitutions for Chocolate Chip Cookies
Feel free to unleash your creativity and make these cookies truly yours with some delicious twists!
-
Nutty Surprise: Add 1 cup of chopped walnuts or pecans for a delightful crunch in every bite. Nuts not only enhance texture but also contribute a lovely flavor complement to chocolate.
-
Fruit Fusion: Toss in ½ cup of dried cranberries or raisins for a burst of chewiness and natural sweetness. This adds a fun contrast to the richness of chocolate chips.
-
Flavorful Chocolate: Switch things up by incorporating flavored chocolate chips, such as mint or butterscotch, for a tasty twist. Each nibble will bring a surprise that keeps everyone guessing!
-
Dairy-Free Delight: Substitute unsalted butter with coconut oil for a vegan version without the dairy. Plus, it brings a subtle coconut flavor that pairs beautifully with chocolate.
-
Whole Grain Goodness: Use whole wheat flour instead of all-purpose for a denser cookie with added fiber. This simple swap will add heartiness to your irresistible treats.
-
Spicy Kick: Sprinkle in a teaspoon of cinnamon or even a pinch of cayenne for a surprising heat. This unexpected flavor blend can elevate your cookies to a whole new level!
-
Chocolate Chunk: Replace chocolate chips with chunks of high-quality dark chocolate for a more sophisticated taste and a delightful melt-in-your-mouth texture.
Each variation opens up new pathways to deliciousness! And why not pair your cookies with a delightful glass of milk or serve alongside some indulgent Strawberry Rolls Zesty for an unforgettable dessert spread? Whether you’re looking for nutty crunch or fruity sweetness, have fun experimenting!
What to Serve with Classic Chewy Chocolate Chip Cookies?
The aroma of freshly baked cookies fills the air, inviting you to build the perfect dessert experience around these sweet delights.
-
Cold Milk: A classic pairing that complements the sweet chocolate, enhancing the overall taste and making each bite even more satisfying.
-
Vanilla Ice Cream: Serve a warm cookie atop a scoop of creamy vanilla ice cream for an indulgent dessert that melts in your mouth.
-
Fruit Salad: Brighten the rich chocolate flavors with a refreshing fruit salad; the juiciness of berries adds a delightful contrast.
-
Coffee or Espresso: The bitterness of a freshly brewed cup balances the sweetness of the cookies, creating a harmonious flavor combination.
-
Chocolate Sauce Drizzle: Elevate the experience by drizzling warm chocolate sauce over the cookies; it’s a chocolaty dream for true lovers of chocolate!
-
Nuts and Seeds: A small bowl of mixed nuts offers a crunchy contrast to the soft, chewy cookie texture, providing a satisfying munch.
-
Caramel Sauce: For a decadent twist, drizzle some caramel sauce over your cookie or serve it on the side for dunking.
-
Chai Tea: Spiced chai tea adds a warm, aromatic touch that beautifully complements the sweet and rich flavors of the cookies.
-
S’mores Dip: Bring a fun twist to dessert with a s’mores dip—perfect for sharing and making delightful memories with loved ones!
Make Ahead Options
These Classic Chewy Chocolate Chip Cookies are perfect for meal prep enthusiasts! You can prepare the cookie dough up to 72 hours in advance by mixing it together and refrigerating it in an airtight container. For those looking to bake fresh cookies any time, consider scooping the dough into tablespoon-sized portions and freezing them for up to 3 months. This way, you can have ready-to-bake cookie dough on hand whenever the craving strikes! When you’re ready to enjoy, simply bake the frozen dough straight from the freezer, adding an extra minute or two to the baking time for the same delicious results. Your homemade cookies will be just as delightful, creating memories with each batch!
How to Store and Freeze Chocolate Chip Cookies
Room Temperature: Store cookies in an airtight container at room temperature for up to 5 days to keep them fresh. This helps maintain their delightful chewy texture.
Freezer: Place cookies in a freezer-safe bag or container, separating layers with parchment paper, and freeze for up to 3 months. Simply thaw at room temperature before enjoying.
Raw Dough Storage: Freeze raw cookie dough in scoopable portions on a baking sheet. Once solid, transfer to a zip-top bag for easy baking later—just bake straight from the freezer!
Reheating: To refresh cookies after storing, heat them in a preheated oven at 350°F (175°C) for about 5 minutes for that fresh-baked warmth and gooey texture.
Classic Chewy Chocolate Chip Cookies Recipe FAQs
How do I choose the best chocolate chips for my cookies?
Absolutely! The type of chocolate chips can make or break your cookie experience. I recommend using a mix of semi-sweet and milk chocolate for a balanced sweetness, offering both richness and a milky flavor. For an adventurous twist, consider incorporating dark chocolate chips for a more intense chocolate experience.
How should I store my chocolate chip cookies?
Store your cookies in an airtight container at room temperature for up to 5 days. This helps them retain their delightful chewiness. If they’re on the soft side, place a slice of bread in the container to keep them fresh!
Can I freeze chocolate chip cookie dough?
Absolutely! To freeze raw dough, scoop out portions using a tablespoon or cookie scoop and place them on a baking sheet in the freezer until firm. Then, transfer the dough balls to a zip-top bag and freeze for up to 3 months. When you’re ready to bake, just take them out and bake straight from the freezer! They may need an extra minute or two.
What can I do if my cookies spread too much while baking?
Very common! If you find your cookies spreading too thin, it could be due to soft butter or too much mixing. To fix this, chill the dough for at least 30 minutes before baking, which helps solidify the fats and results in thicker cookies. You can also try adding a bit more flour, a tablespoon at a time, until the dough holds its shape better.
Are chocolate chip cookies safe for my pet?
Not at all! Be cautious as chocolate is toxic to dogs and can cause serious health issues. It’s best to keep chocolate chip cookies out of reach of your furry friends and opt for pet-friendly treats instead!
How can I tell when my cookies are done baking?
Look for those golden edges! The center should look slightly underbaked—it’ll continue to cook on the baking sheet after you take them out of the oven. This is key for achieving that soft, chewy center we all love in classic chewy chocolate chip cookies.
Crispy Chinese Vegetable Spring Roll Perfection at Home
Ingredients
Equipment
Method
- In a mixing bowl, combine shredded cabbage, grated carrots, bean sprouts, soy sauce, and sesame oil.
- Take a spring roll wrapper and place a tablespoon of the vegetable mixture at one end, folding in the sides and rolling tightly.
- Repeat with the remaining wrappers and filling.
- Heat oil in a frying pan over medium heat.
- Fry spring rolls in batches until golden brown, about 3-4 minutes each side.
- Remove and drain on paper towels.
Leave a Reply