
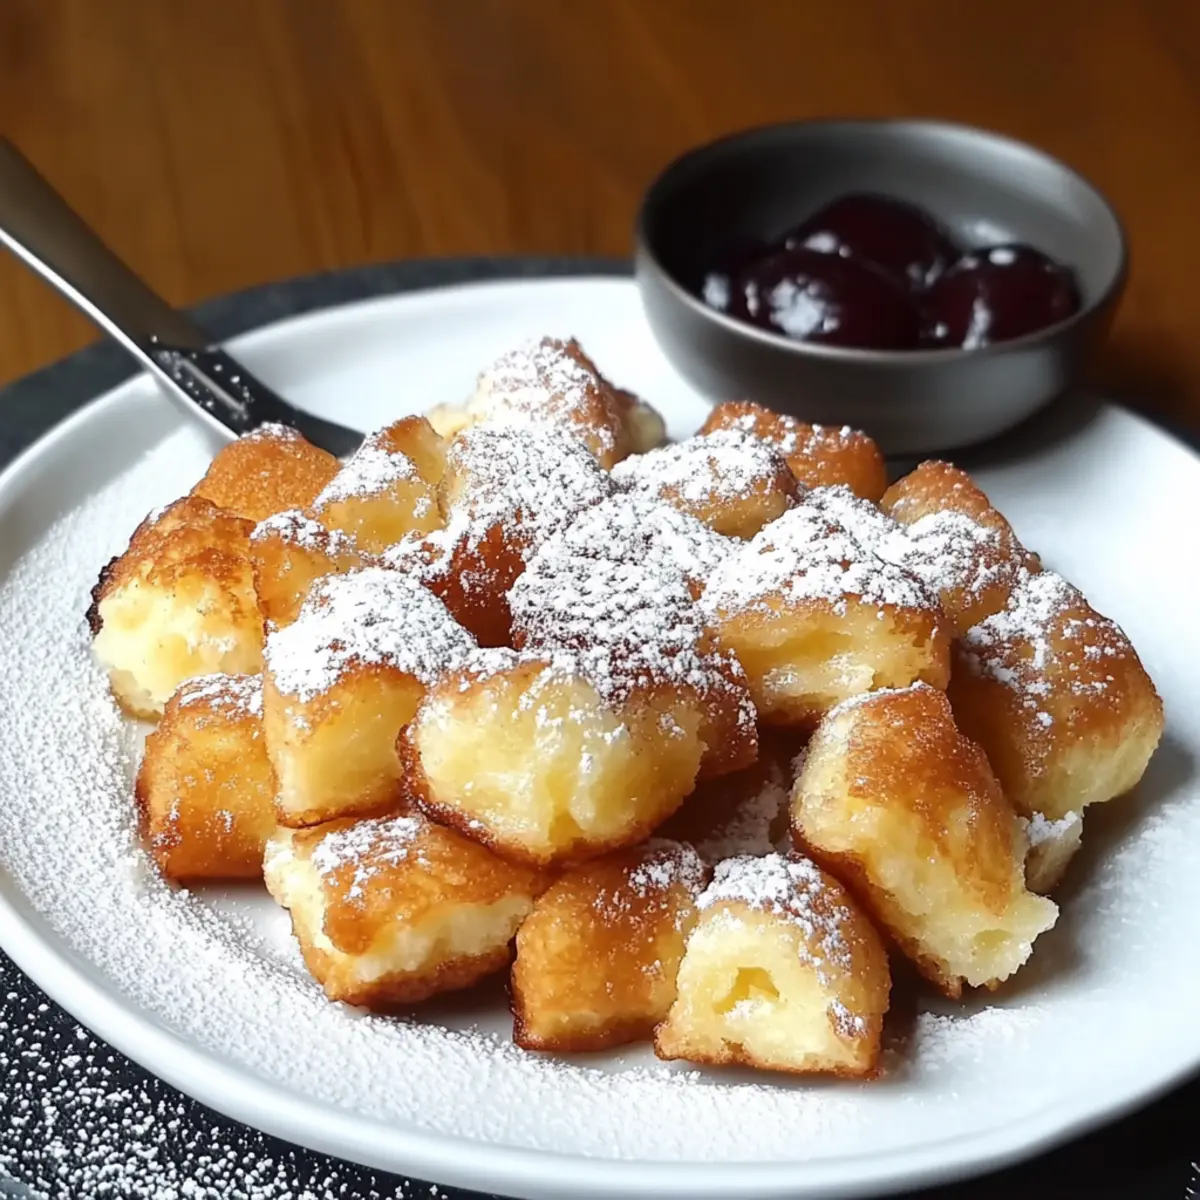
As I flipped through an old recipe book, the pages fluttered open to a charming dish known as Kaiserschmarrn—a beloved Austrian delight. Inspired by the enchanting aroma of vanilla and caramelizing butter, I rushed to recreate this Light and Fluffy Shredded Pancake that captures pure joy in every bite. Within just 15 minutes, you can transform simple ingredients into a customizable feast that suits any palate, be it sweet or savory! Whether you want to add chocolate chips, fresh fruits, or nuts, this quick recipe allows you to tailor your pancake experience. Plus, it’s versatile enough for gluten-free and dairy-free adaptations, making it perfect for everyone at your brunch table. Curious about how to make a fluffy masterpiece that feels like a cozy hug? Let’s dive in!
Why is this Shredded Pancake Special?
Simplicity: This recipe is incredibly easy to follow, making it perfect for both novice and seasoned cooks alike.
Customizable: You can tailor it to your taste by adding fruits, nuts, or even chocolate chips, ensuring every pancake can be a new experience!
Quick to Prepare: In just 15 minutes, you’ll have a delightful treat that satisfies cravings without hours in the kitchen.
Crowd-Pleasing: This Fluffy Shredded Pancake is a sure hit at brunches, appealing to kids and adults alike. Serve it warm with a side of fresh fruit or your favorite compote for a delightful contrast!
Diet Friendly: With options for gluten-free and dairy-free ingredients, this pancake caters to various dietary needs without compromising flavor.
Shredded Pancake Ingredients
Transform your breakfast with these delightful ingredients!
For the Batter
• Eggs – Provides structure and richness; use large, fresh eggs for best results.
• Salt – Enhances flavors and balances sweetness.
• Granulated Sugar – Adds sweetness; adjust according to your preference for this shredded pancake.
• Milk – Adds moisture; substitute with almond or oat milk for a dairy-free option.
• Vanilla Extract – Introduces aromatic sweetness; consider using vanilla sugar for a more intense flavor.
• All-Purpose Flour – Provides structure; opt for gluten-free flour for gluten-sensitive diets.
• Raisins – Optional, adds natural sweetness; soak them in brown rum for an enhanced flavor experience.
For Cooking
• Butter or Oil – Used for frying, creating a rich flavor in your pancake.
For Serving
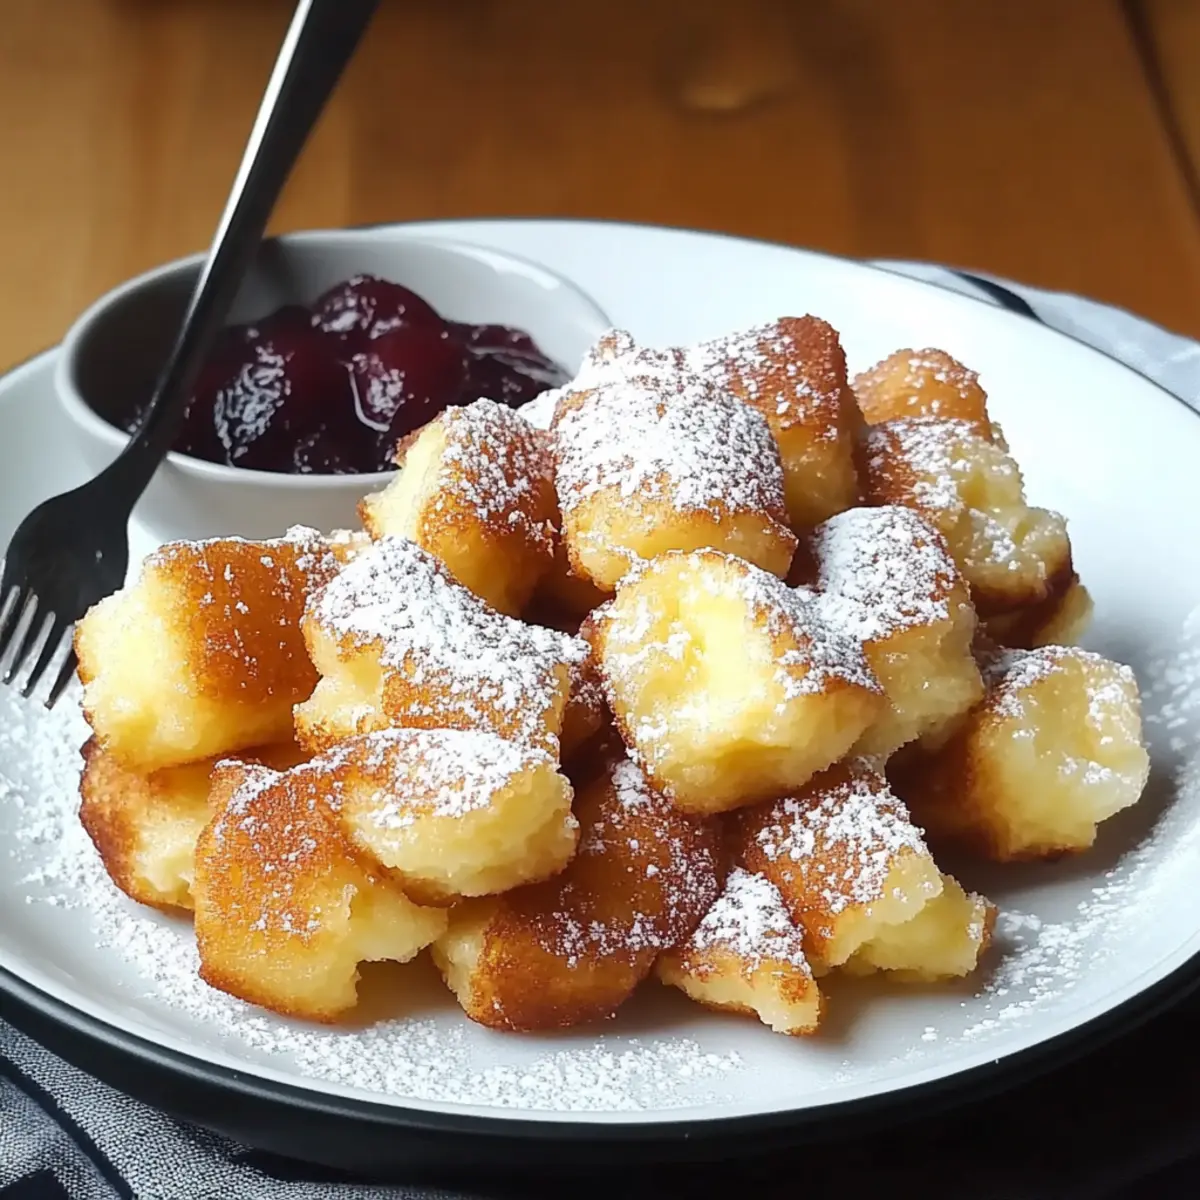
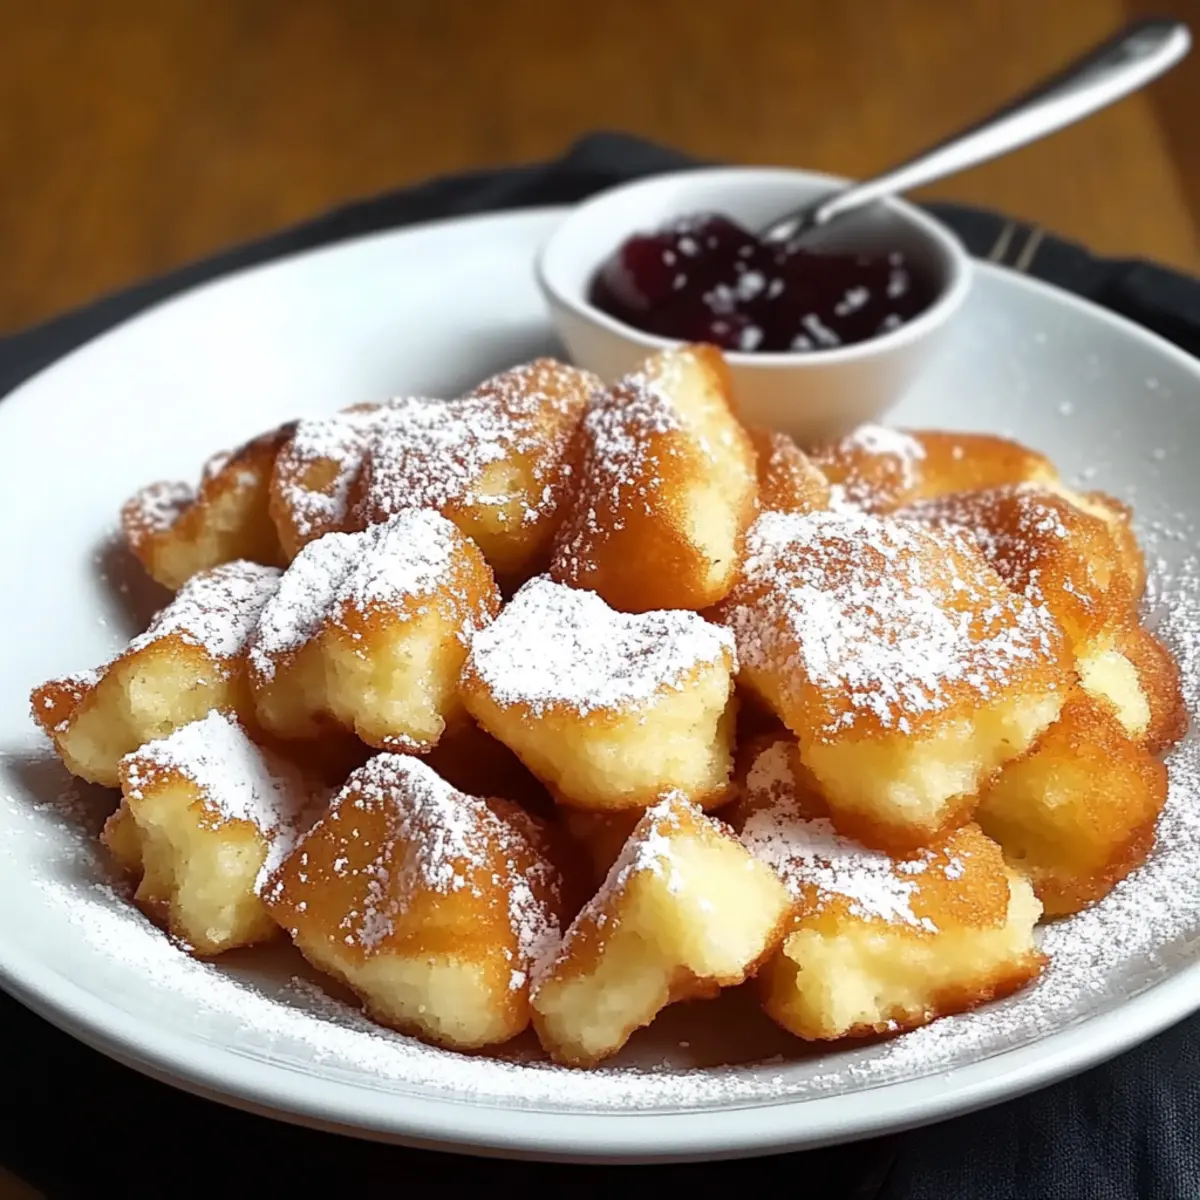
• Powdered Sugar – For dusting, adds a sweet finish to each piece.
• Compote – Traditionally plum or your favorite jam for a delightful serving twist.
Step‑by‑Step Instructions for Shredded Pancake
Step 1: Preheat the Oven
Begin by preheating your oven to 400°F (200°C). This ensures that your Shredded Pancake will cook evenly once it’s ready to bake. Prepare a large ovenproof frying pan by placing it on the stove, as we’ll use it for both frying and baking.
Step 2: Beat the Egg Whites
In a clean mixing bowl, add the egg whites along with a pinch of salt and a tablespoon of granulated sugar. Using an electric mixer, whip them until soft-to-firm peaks form, which should take about 3-4 minutes. The peaks should hold their shape but still have a glossy finish, signifying they’re ready for folding into the batter.
Step 3: Prepare the Yolk Mixture
In a separate bowl, whisk together the egg yolks, milk, vanilla extract, and flour until smooth and well combined. This will form the luscious base for your Shredded Pancake. You want a batter that has a pouring consistency, so mix thoroughly to avoid any lumps.
Step 4: Combine the Mixtures
Gently fold one-third of the whipped egg whites into the yolk mixture using a spatula. This helps lighten the batter. Once combined, gradually fold in the remaining egg whites until there are no streaks. Be careful not to deflate the mixture, maintaining that airy quality is key to a fluffy pancake.
Step 5: Heat the Pan
Place your large ovenproof frying pan over medium heat and add a generous amount of butter or oil to coat the bottom. Allow it to melt and get slightly bubbling, which should take about 1-2 minutes. Ensure the pan is hot enough for a golden crust but not smoking.
Step 6: Cook the Batter
Carefully pour the batter into the hot pan, spreading it evenly. Cook for about 1 minute, capping your surface with a lid to help trap heat. Watch for the edges to set and the top to just begin to bubble, signaling it’s ready to transition to the oven.
Step 7: Bake the Pancake
Transfer the pan to your preheated oven and bake for 10-12 minutes. Look for the pancake to puff up and turn a beautiful golden brown. This creates an irresistibly fluffy texture, essential for your Shredded Pancake experience.
Step 8: Flip for Final Cooking
Once baked, carefully remove the pan from the oven. Use a spatula to quarter the pancake, then flip each piece over to sear the other side for another 1-2 minutes on the stovetop. This adds a delightful crispness while keeping the interior tender and airy.
Step 9: Tear and Serve
Finally, using two forks or your hands, tear the pancake into bite-sized pieces. Dust generously with powdered sugar for a sweet finish. Serve warm, accompanied by your favorite compote, enjoying the gorgeous texture and customizable flavors of this delightful Shredded Pancake.
Make Ahead Options
These Light and Fluffy Shredded Pancakes are perfect for meal prep enthusiasts! You can prepare the batter up to 24 hours in advance by mixing the egg yolk mixture (with milk, flour, and vanilla) and storing it in an airtight container in the refrigerator. Whip the egg whites just before cooking to keep them fluffy. Additionally, you can soak raisins in rum for enhanced flavor and store them separately. When ready to serve, simply combine the mixtures, cook in a hot pan, and bake as directed for that delightful, airy texture just as delicious as when freshly made. Enjoy a scrumptious breakfast with minimal effort on busy mornings!
Expert Tips for the Best Shredded Pancake
• Beat for Fluffiness: Ensure egg whites are whipped to soft-to-firm peaks; this is crucial for achieving that light and airy shredded pancake texture.
• Avoid Overcrowding: Use a large enough pan to let the pancake spread evenly; overcrowding can lead to uneven cooking and a denser result.
• Mix-In Placement: For even flavor, distribute any fruits or chocolate chips evenly throughout the batter before cooking, enhancing every bite of your shredded pancake.
• Oven Transition: Utilize the oven for cooking to simplify flipping; it allows for an even puff while minimizing mess compared to traditional stovetop methods.
• Adjust for Ovens: If using a fan oven, lower the temperature by about 25°F to ensure the pancake bakes perfectly without burning.
What to Serve with Light and Fluffy Shredded Pancake
Warm, comforting delights await your brunch table as you explore delicious pairings to elevate your pancake experience.
-
Fresh Berry Medley: Complement the sweetness with a vibrant mix of strawberries, blueberries, and raspberries, offering a fresh burst of flavor and color.
-
Sweet Compote: Drizzle some homemade plum or berry compote, adding a tangy sweetness that perfectly contrasts with the fluffy pancake.
-
Greek Yogurt: Serve alongside creamy Greek yogurt for a protein boost and tangy finish, balancing the sweetness of your shredded pancake beautifully.
-
Whipped Cream: A dollop of freshly whipped cream brings a rich, luxurious touch, making every bite a heavenly experience.
-
Maple Syrup: No pancake is complete without a drizzle of rich maple syrup, enhancing the fluffy texture with sticky sweetness that everyone loves.
-
Crunchy Granola: Sprinkling some crunchy granola on top creates a delightful texture contrast while adding nutty flavors that lift the dish.
-
Chai Spice: For those who seek warmth, add a sprinkle of chai or cinnamon spice to the pancakes while serving. It infuses a cozy aroma and pairs beautifully with all the sides.
-
Chilled Sparkling Water: Refresh the palate with sparkling water infused with lemon or mint, providing a light contrast to the warm, sweet flavors of the pancake.
-
Coffee or Tea: A warm cup of coffee or herbal tea pairs perfectly, enhancing the cozy brunch experience with your Light and Fluffy Shredded Pancake.
Storage Tips for Shredded Pancake
-
Room Temperature: Store leftovers in an airtight container for up to 1 day to retain their texture. Enjoy them fresh for the best flavor!
-
Fridge: Keep in an airtight container for up to 3 days; reheat gently in a skillet over low heat to restore fluffiness.
-
Freezer: Wrap individual pieces in plastic wrap and store them in a resealable bag for up to 2 months. Thaw in the fridge overnight before reheating to enjoy this delicious shredded pancake again.
Shredded Pancake Variations & Substitutions
Customizing your Shredded Pancake is a delightful way to enhance flavors and cater to your cravings!
-
Dairy-Free: Substitute milk with almond or oat milk for a creamy, dairy-free option. This keeps it delicious while accommodating dietary needs.
-
Fruit-Infused: Mix fresh apples or pears into the batter. Their natural sweetness pairs beautifully with the fluffy pancake, adding a burst of fruity flavor!
-
Chocolate Lovers: Stir in chocolate chips to the batter for a rich and indulgent treat. Imagine a bite that’s both fluffy and decadently chocolatey—delightful!
-
Nutty Texture: Add chopped walnuts or almonds for a delightful crunch. The added texture elevates your pancake, making it more satisfying.
-
Spices: Incorporate ground cinnamon or a touch of citrus zest to invigorate the flavor. These spices bring warmth and brightness, enhancing the overall experience.
-
Savory Twist: Try incorporating crumbled bacon or cheese for a unique savory version. This unexpected option turns your sweet pancake into a delightful meal.
-
Gluten-Free: Use gluten-free flour to ensure everyone can enjoy this dish. With this simple swap, you’re keeping it inclusive without sacrificing taste!
-
Compote Variations: Experiment with different compotes like raspberry or apricot for distinct flavor profiles. Each choice offers a new experience, adding depth to your serving.
Feel free to explore these variations. Just remember, each twist adds character to the already charming Shredded Pancake, sparking joy in every bite! If you want to dive deeper into ingredient options, you might find the all-purpose flour and dairy-free substitutions particularly helpful.

Shredded Pancake Recipe FAQs
What kind of eggs should I use?
Absolutely! For the Light and Fluffy Shredded Pancake, I recommend using large, fresh eggs. They provide the best structure and richness, which is essential for achieving that airy texture. Fresh eggs also enhance the overall flavor, so you can taste the difference!
How should I store leftovers?
If you have leftover Shredded Pancake, store it in an airtight container at room temperature for up to 1 day for optimal taste. If you want to keep it longer, transfer it to the fridge for up to 3 days. Just make sure to reheat it gently in a skillet over low heat to regain its fluffiness. The more the merrier when sharing this delicious treat!
Can I freeze the Shredded Pancake?
Yes, you can freeze individual pieces of your Shredded Pancake! First, wrap each piece in plastic wrap, ensuring it’s tightly sealed. Then, place them in a resealable bag for up to 2 months. When you’re ready to enjoy again, simply thaw the pieces in the fridge overnight. Reheat gently in a skillet, and you’ll have that delightful fluffiness once more!
What should I do if my pancake doesn’t puff up?
If your pancake doesn’t puff up as expected, it could be due to under-whipped egg whites. Ensure they’re beaten to soft-to-firm peaks; this is crucial for achieving the fluffy texture. Additionally, avoid overcrowding the pan, as this can lead to uneven cooking. Lastly, check that your oven is at the correct temperature; too low might prevent it from baking properly.
Can I make this pancake dairy-free or gluten-free?
Very much! To make the Shredded Pancake dairy-free, simply substitute the milk with almond or oat milk. For a gluten-free option, swap the all-purpose flour for gluten-free flour. Both substitutions maintain the deliciousness, proving that everyone can enjoy this delightful treat!
Fluffy Shredded Pancake Recipe for a Sweet Morning Treat
Ingredients
Equipment
Method
- Preheat your oven to 400°F (200°C) and prepare a large ovenproof frying pan.
- Beat the egg whites with a pinch of salt and a tablespoon of granulated sugar until soft-to-firm peaks form, about 3-4 minutes.
- In a separate bowl, whisk together the egg yolks, milk, vanilla extract, and flour until smooth.
- Fold one-third of the whipped egg whites into the yolk mixture, then gradually fold in the remaining egg whites.
- Heat the pan over medium heat, add butter or oil, and let it melt and bubble for 1-2 minutes.
- Pour the batter into the hot pan and cook for about 1 minute, covering it with a lid.
- Transfer the pan to the oven and bake for 10-12 minutes until golden brown.
- Remove the pan from the oven, quarter the pancake, and flip each piece to sear the other side for 1-2 minutes.
- Tear the pancake into bite-sized pieces and dust with powdered sugar. Serve warm with compote.
Leave a Reply